haewired
-
Posts
52 -
Joined
-
Last visited
Content Type
Profiles
Forums
Downloads
Gallery
Store
Everything posted by haewired
-
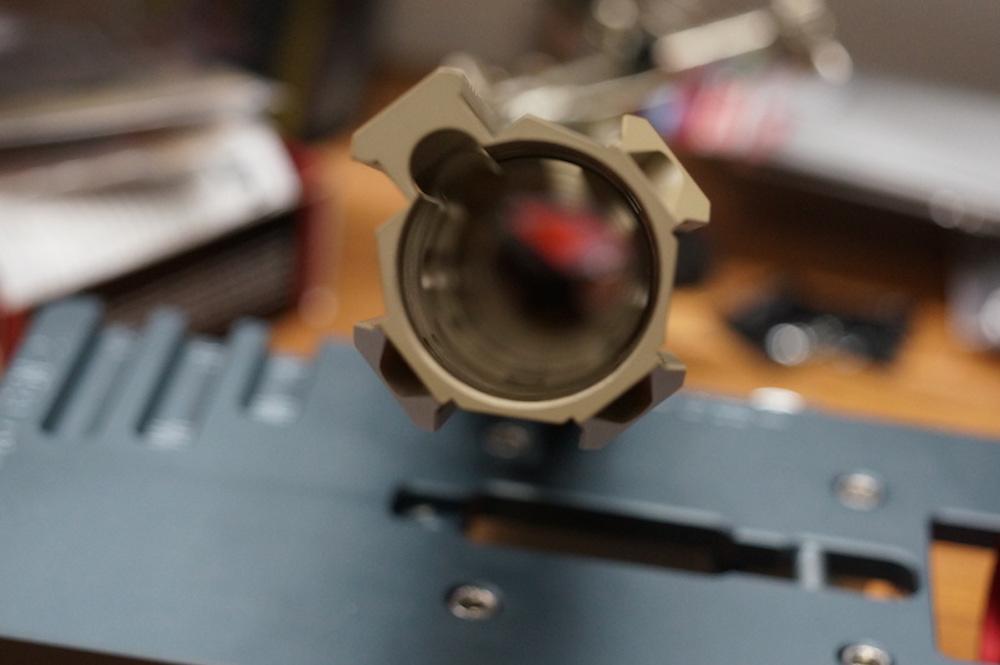
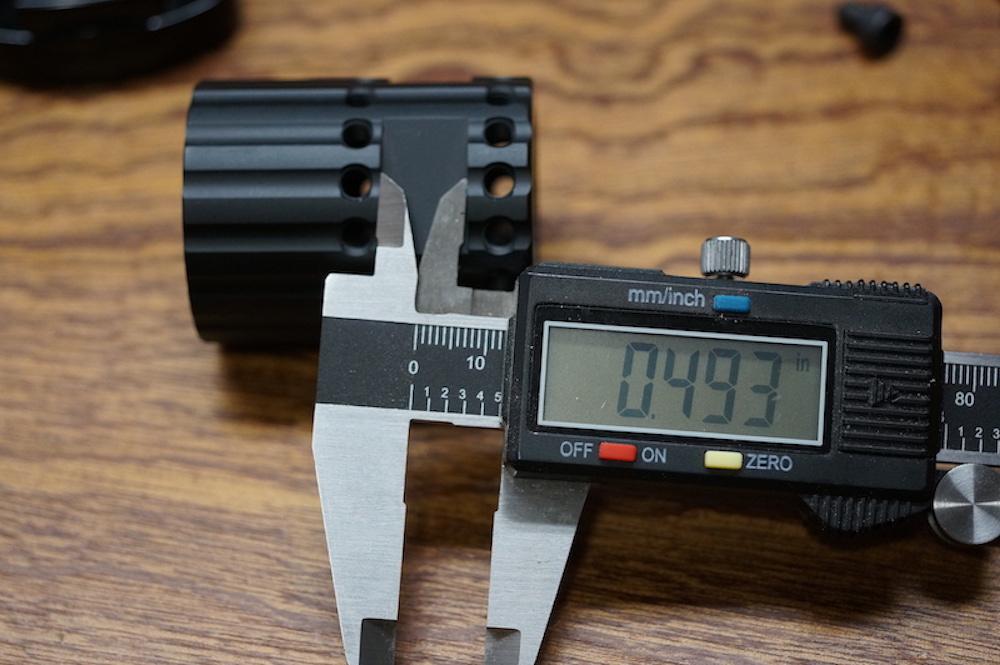
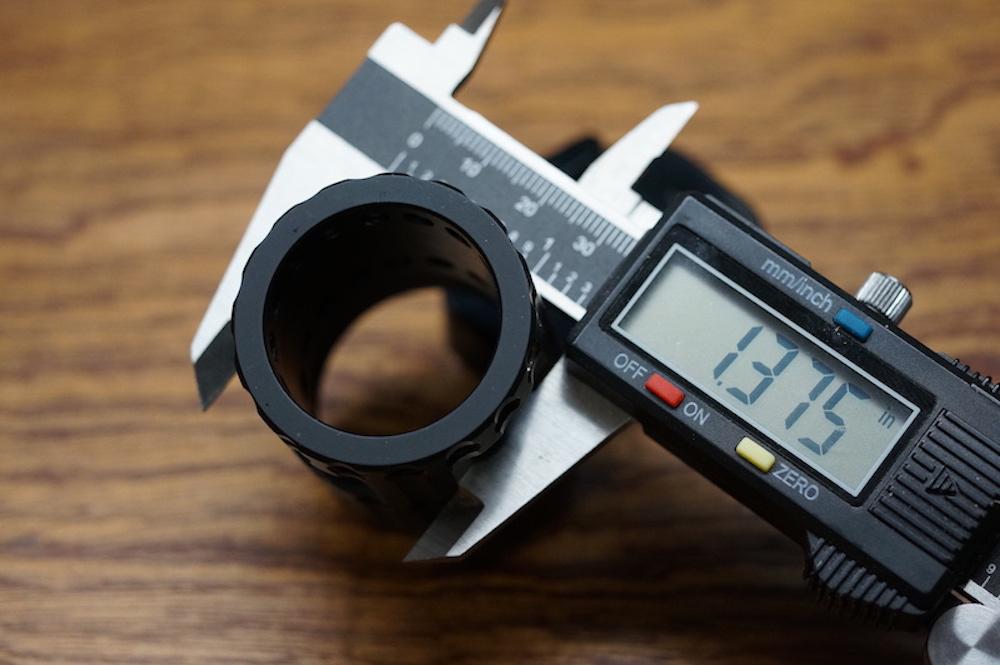
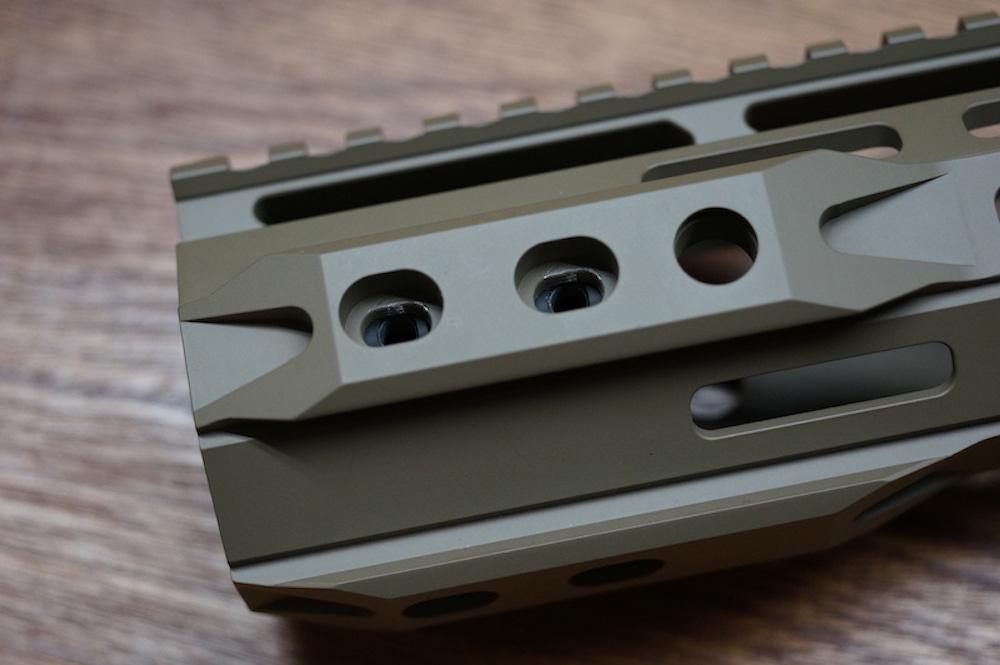
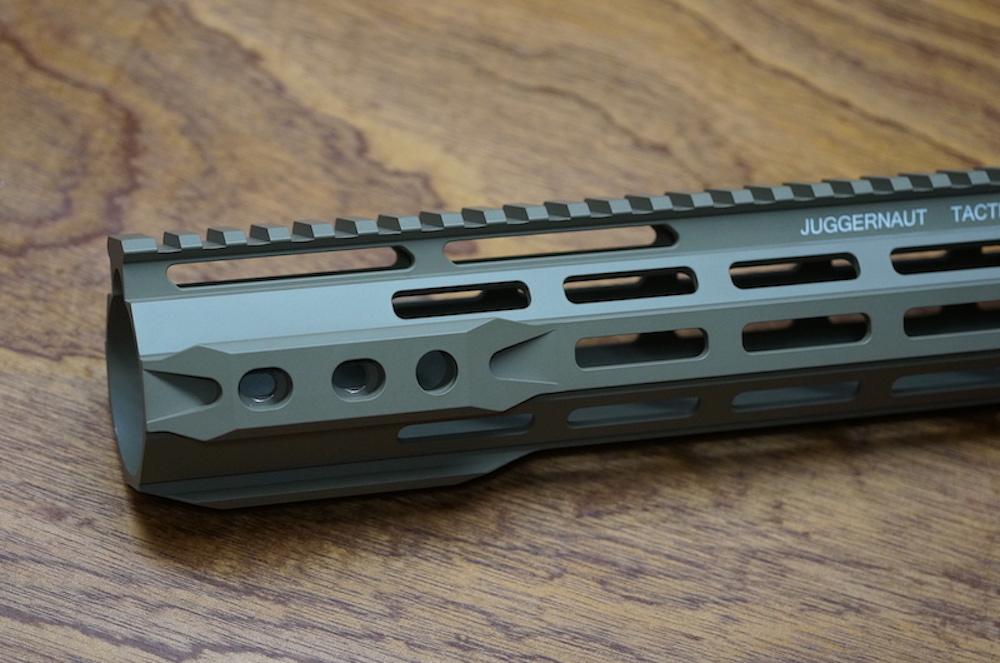
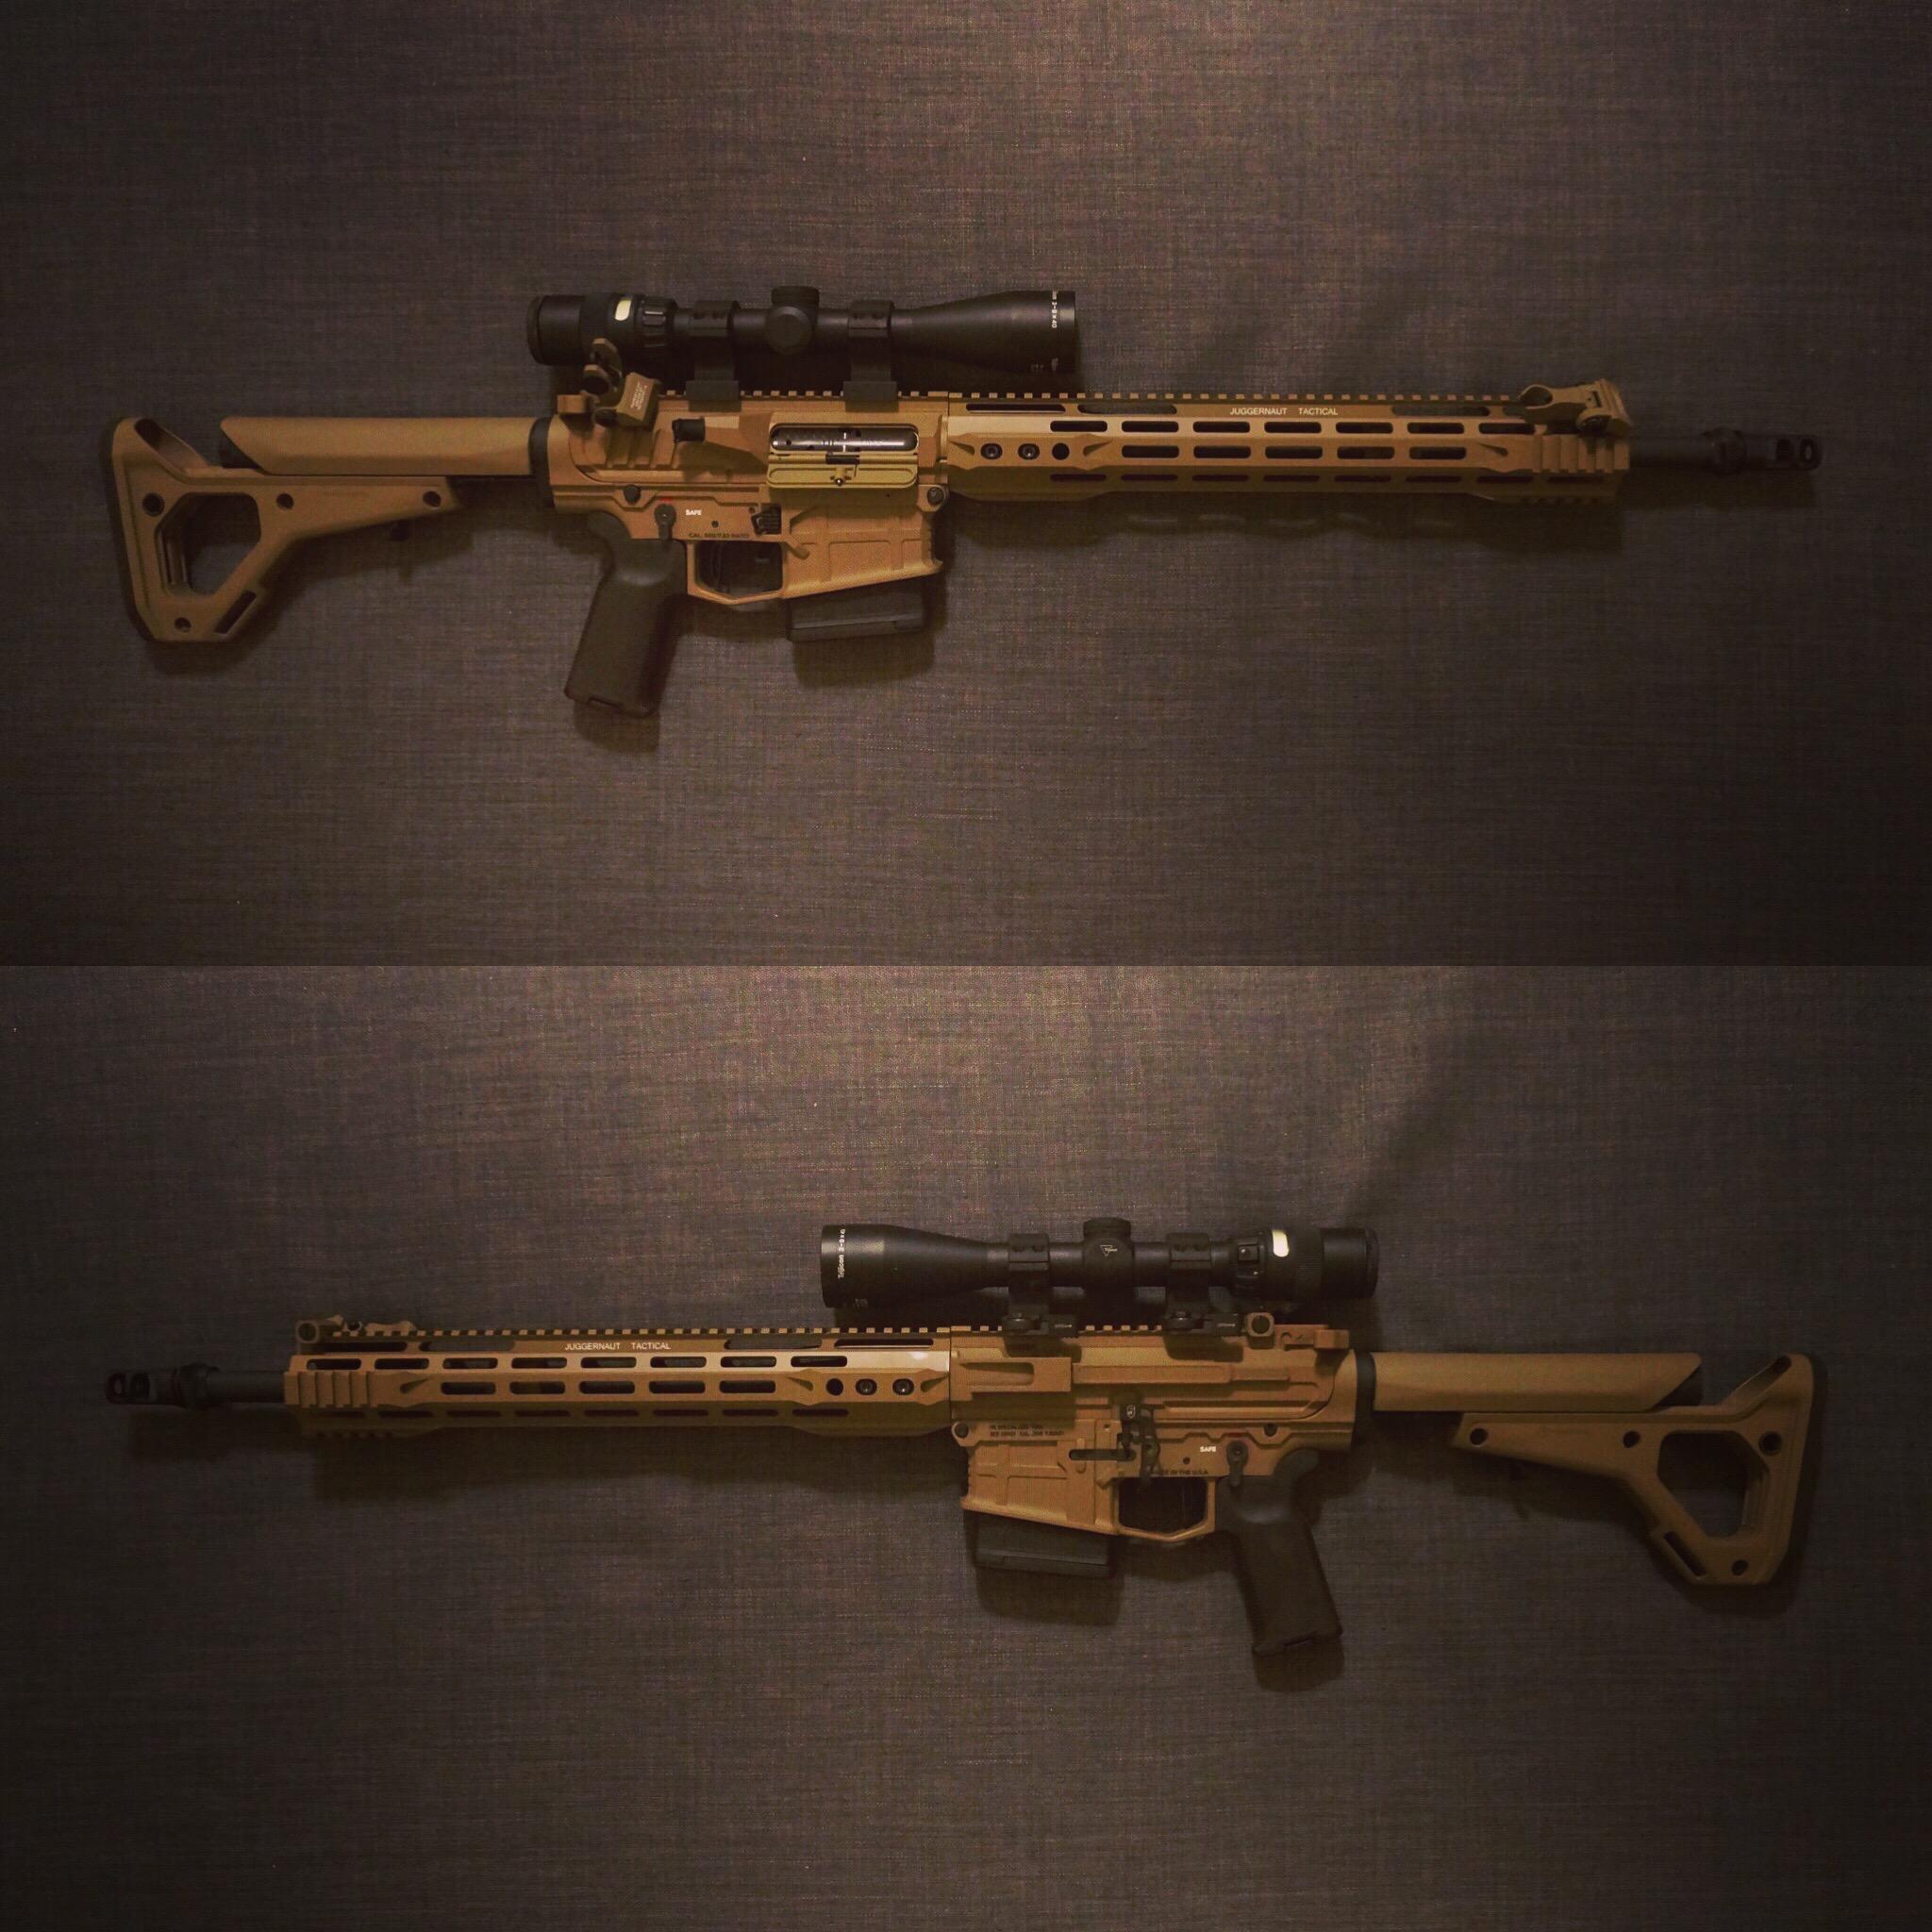
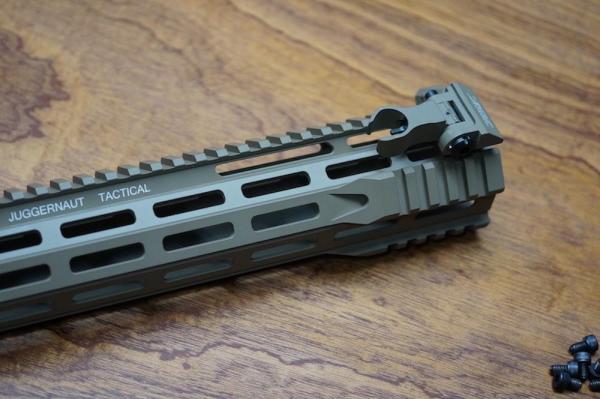
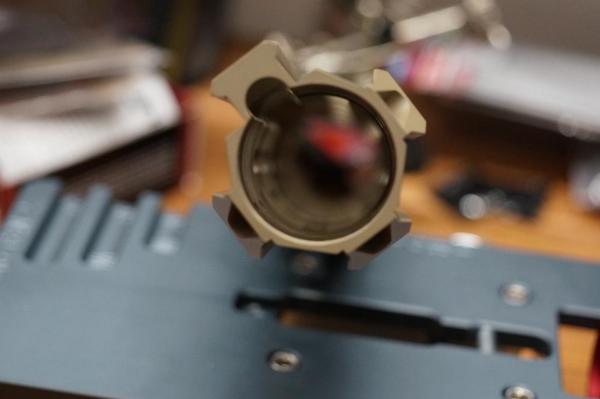
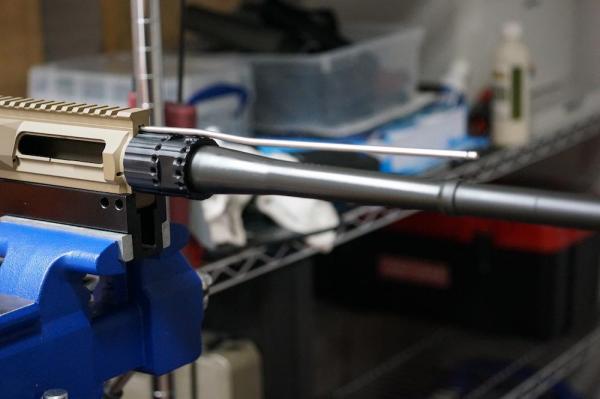
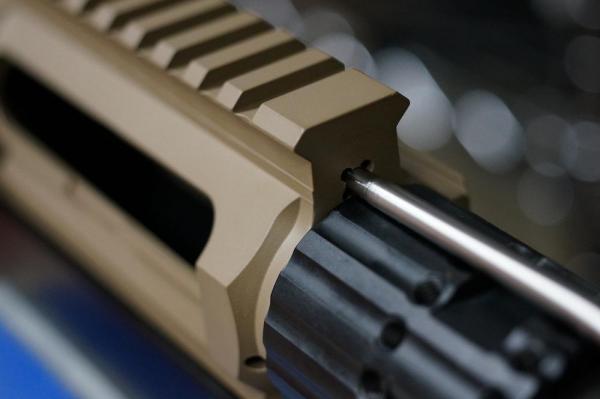
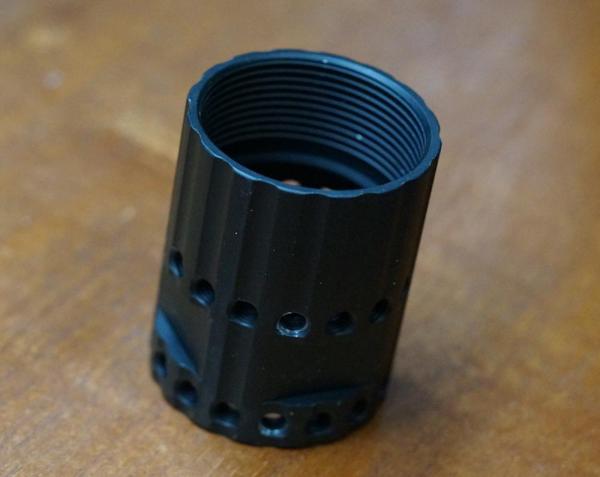
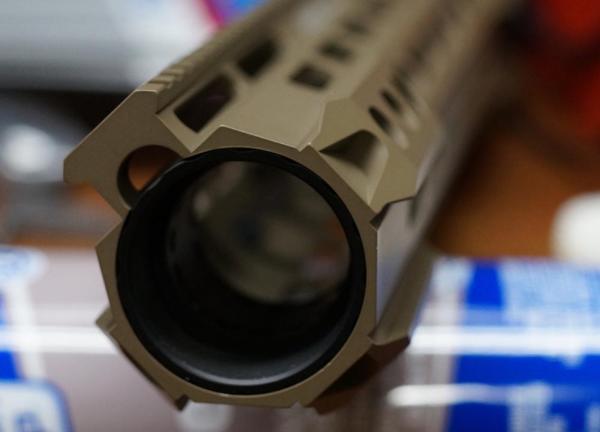
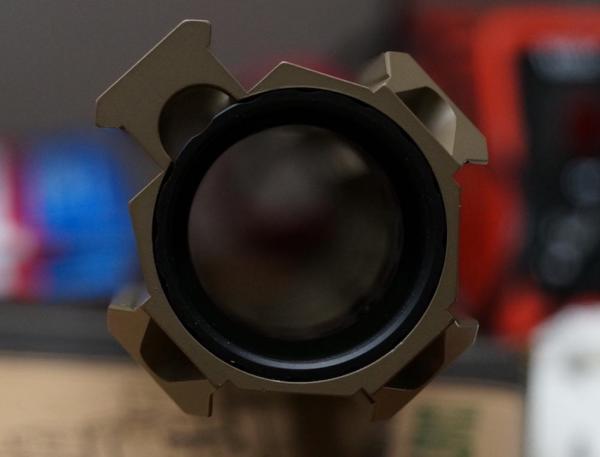
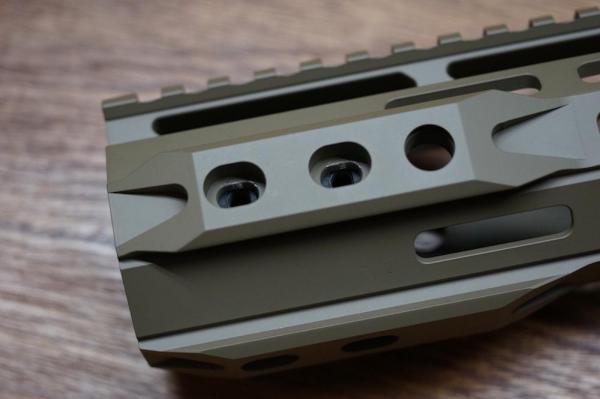
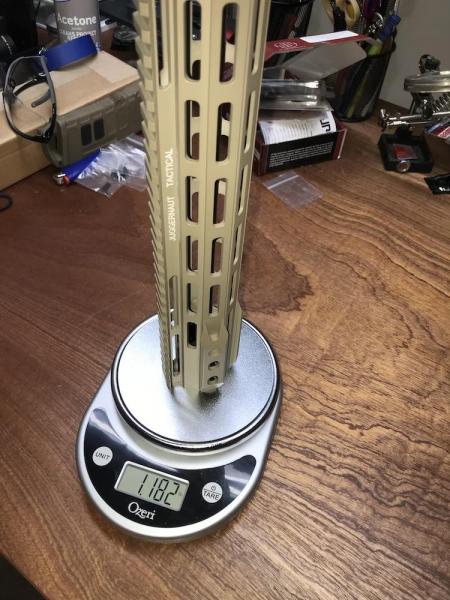
Here’s my review of the Juggernaut Tactical AR308 Free float Handguard. I’m just an enthusiast so take my review with a grain of salt, hopefully it will help you out later down the line. There isn’t much out there about this rail so I thought to chime in. These rails come in a variety of colors, anodized or Cerakoted. You also have a choice of different lengths from 12”, 15”, or 16.5”. It’s constructed entirely from aluminum and it weighs about 0.5 lbs heavier than most light weight rails on the market. What I liked about this rail is it has a heavy duty look to it and it has Picatinny rails on the end of the rifle which is something I always add when I pick up a M-LOK rail anyway. ordered one in Flat Dark Earth and the work was very good. No blemishes and strong enough for heavy work. They claim that the rail height is “DPMS High Profile” but the rail on my upper ended up a bit taller then the Juggernaut. It’s also nice that the rail comes with Quick Detach Sling mounts on the bottom, right, and left sides. The entire assembly weighs in at 1.18 lbs (Who feels weight in Ounces?). The Barrel nut is made of 7075 T6 Aluminum, and has a good snug fit with the rail. It has four flats Which requires a 1 3/8” opened ended wrench or crows foot. Caveat here, you may need to grind down the thickness of the tool’s “Gate” as the flats are a bit narrow. Since the barrel nut is aluminum, I’m always nervous when it comes to threading in screws to secure the rail to it. There are groves milled in for the gas tube like most other barrel nuts. In my case I installed my rail to a JP upper. Since JP uses tight tolerances the combination of the two would not allow the gas tube to clear the receiver without some modification. It was either filing down the Upper, Barrel Nut, or gas tube. So I went with the easier of the three and filled down the top end of the gas tube so it could clear the receiver. Still though this caused the gas tube to naturally point upward as you’ll see in the pictures. Maybe the smarter thing to do here is file down the barrel nut, but so far it seems to work just fine. Overall I’m happy with this rail, I wish it was a bit lighter but I like the robust look and utilitarian features. One thing to note is in this day and age sellers are good about keeping the consumer abreast about the status of their order(s). Other than the initial email confirming the order, I didn’t hear anything for two weeks. So I sent an email asking about the status and they replied the same day that it should be ready by next week. So I patiently waited and finally received an email just over a week later saying that it was shipped. It took about a month to receive my order. I’ve heard that Juggernaut isn’t always there when it comes to communication. Funny thing is I recently ordered a “Raw” 308 AR Lower from them and I received it with 10 days. So your experience may vary. Hope this helps and have fun building!


-
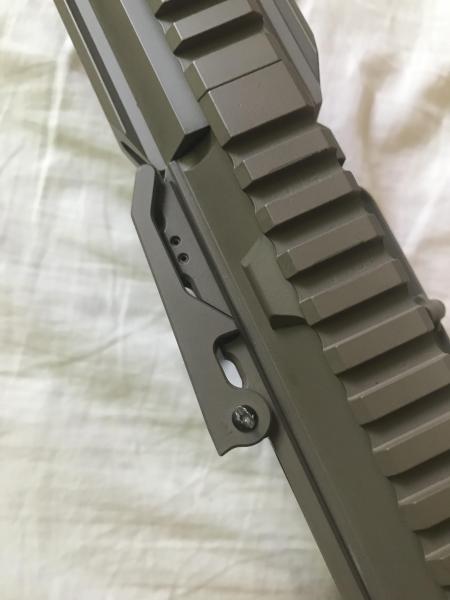
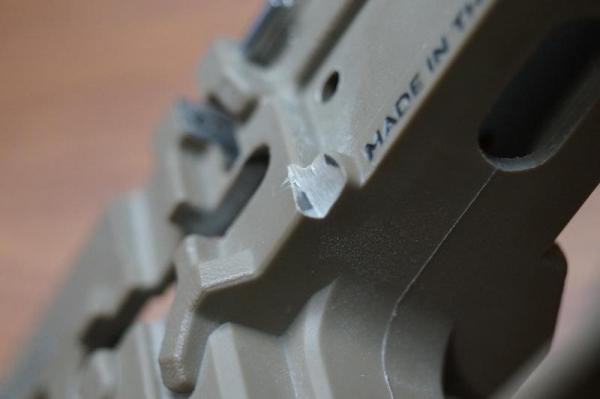
Ah, this receiver also has a high profile rail/tang. I’m using a Juggernaut Tactical rail and the JP receiver is slightly taller than the rail (Proud). You can see this in the pictures. No such thing as Milspec, right? Thanks!
-
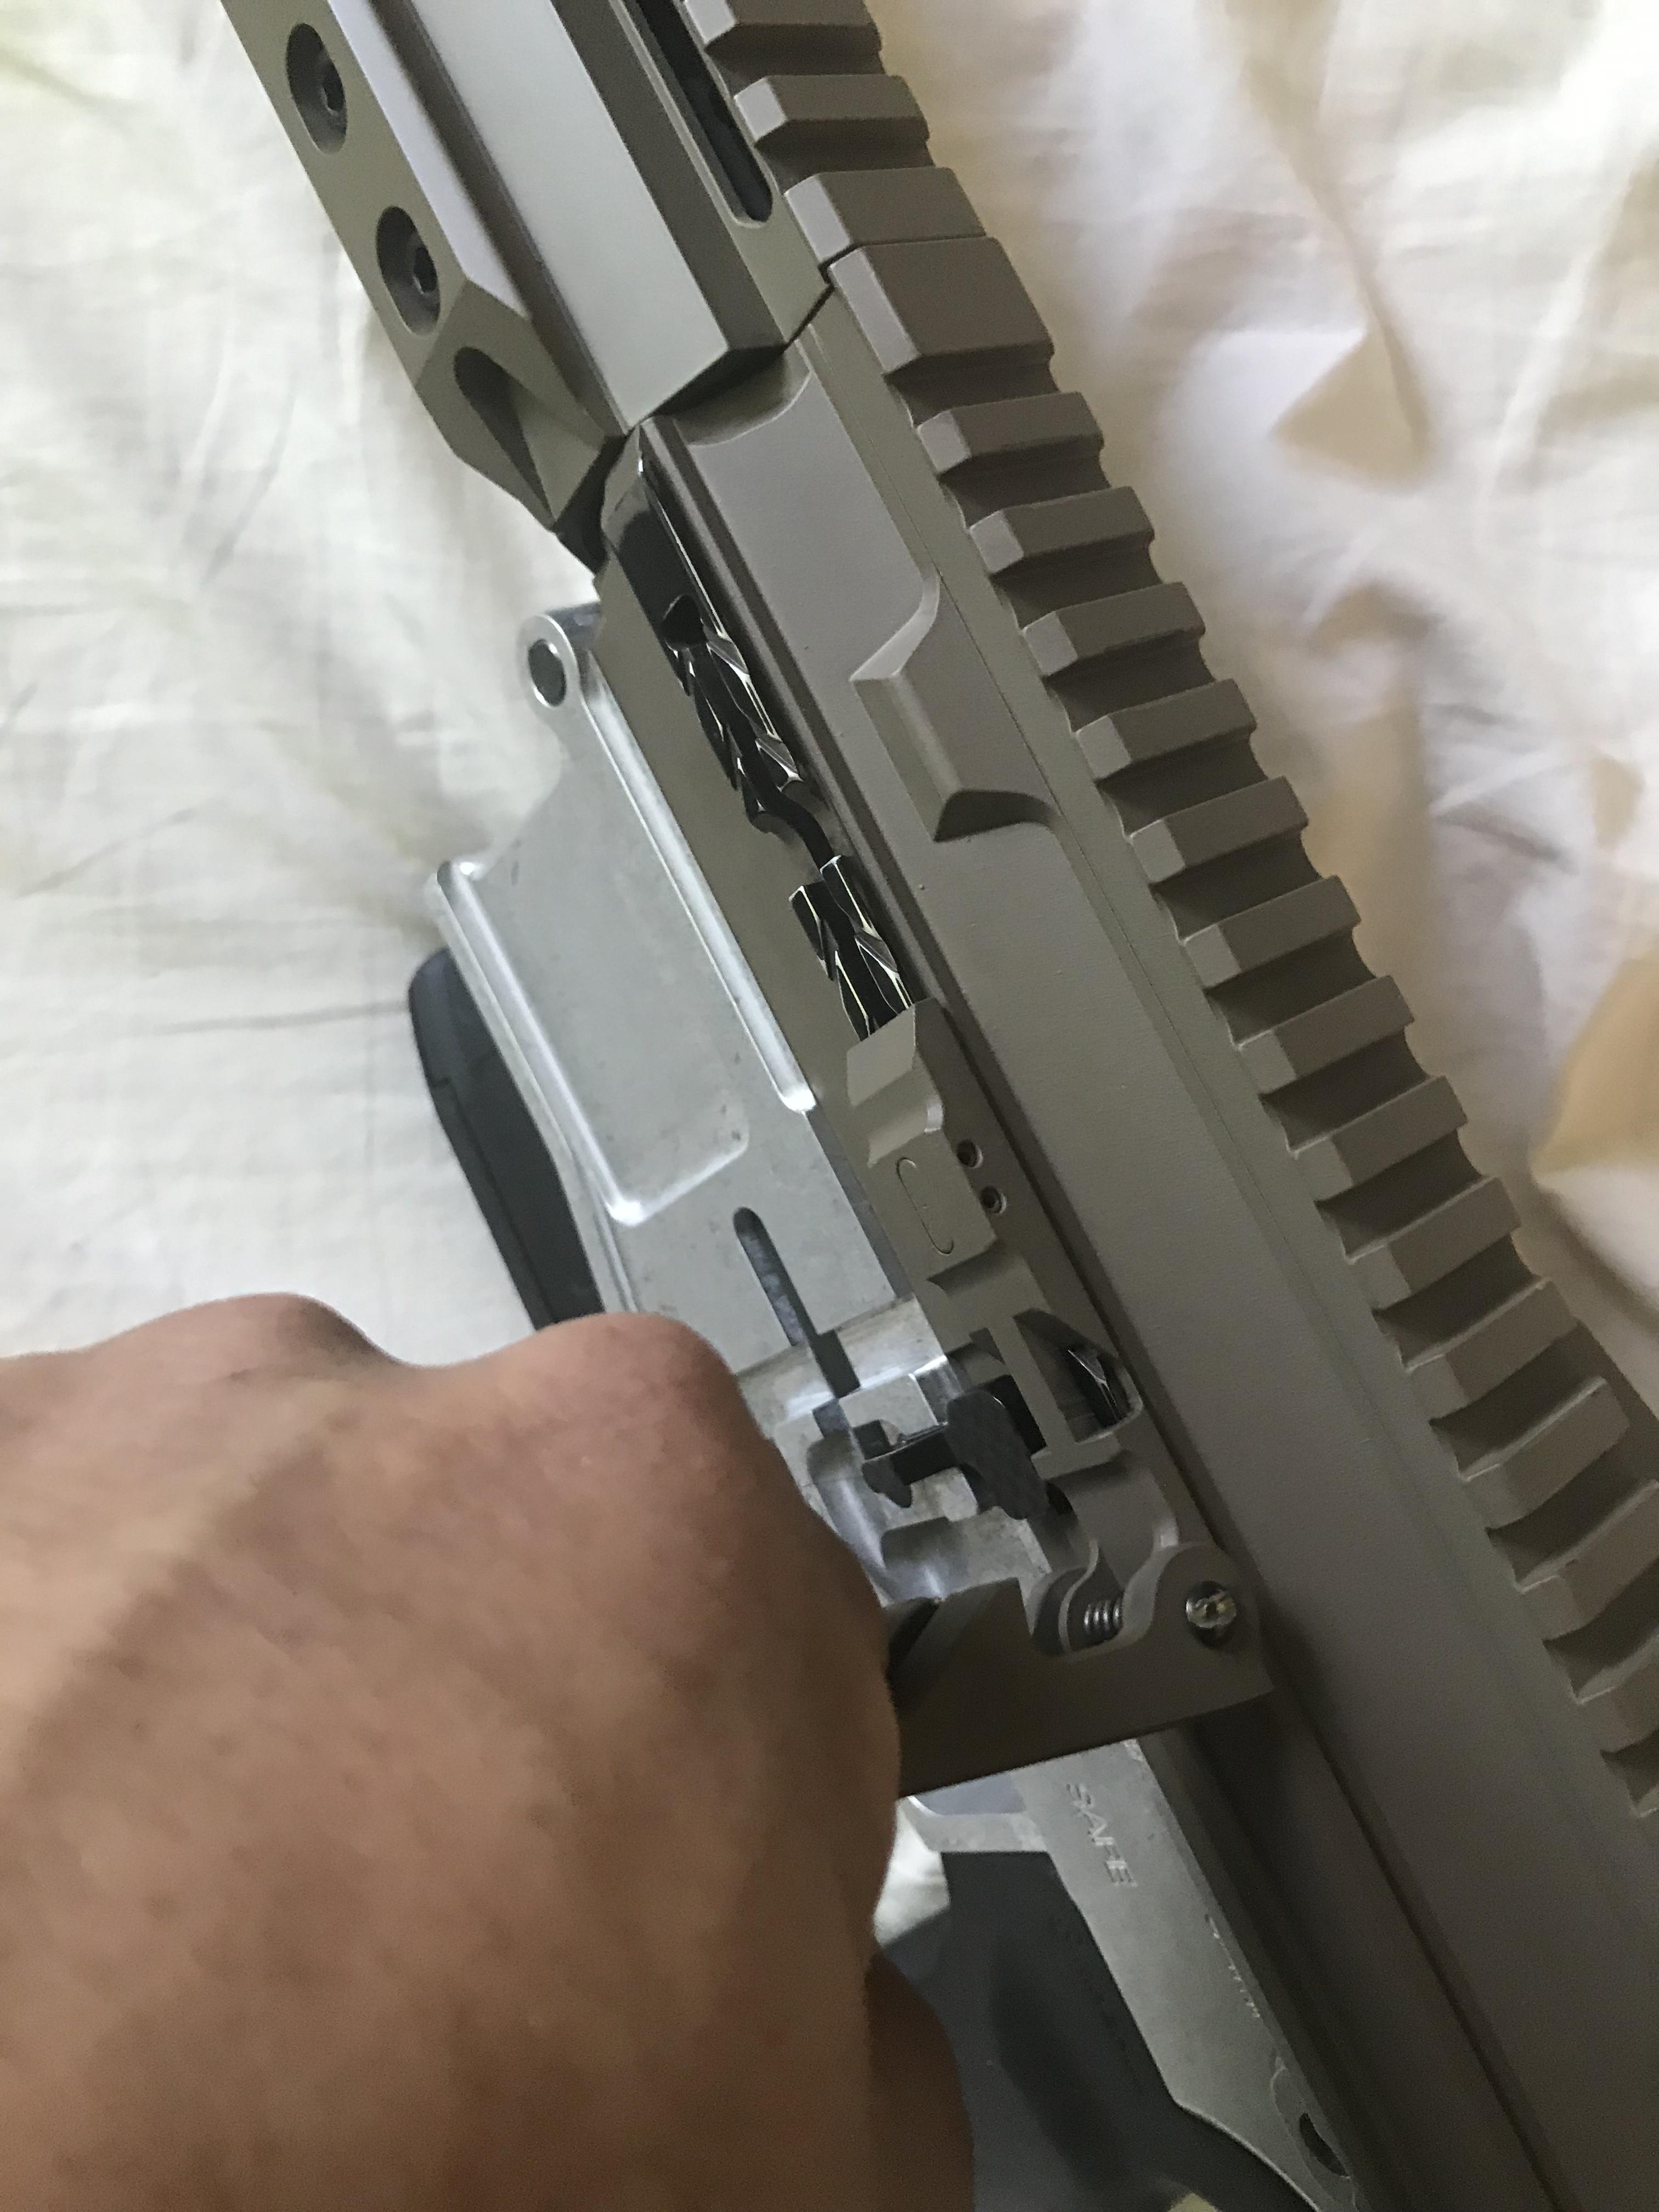
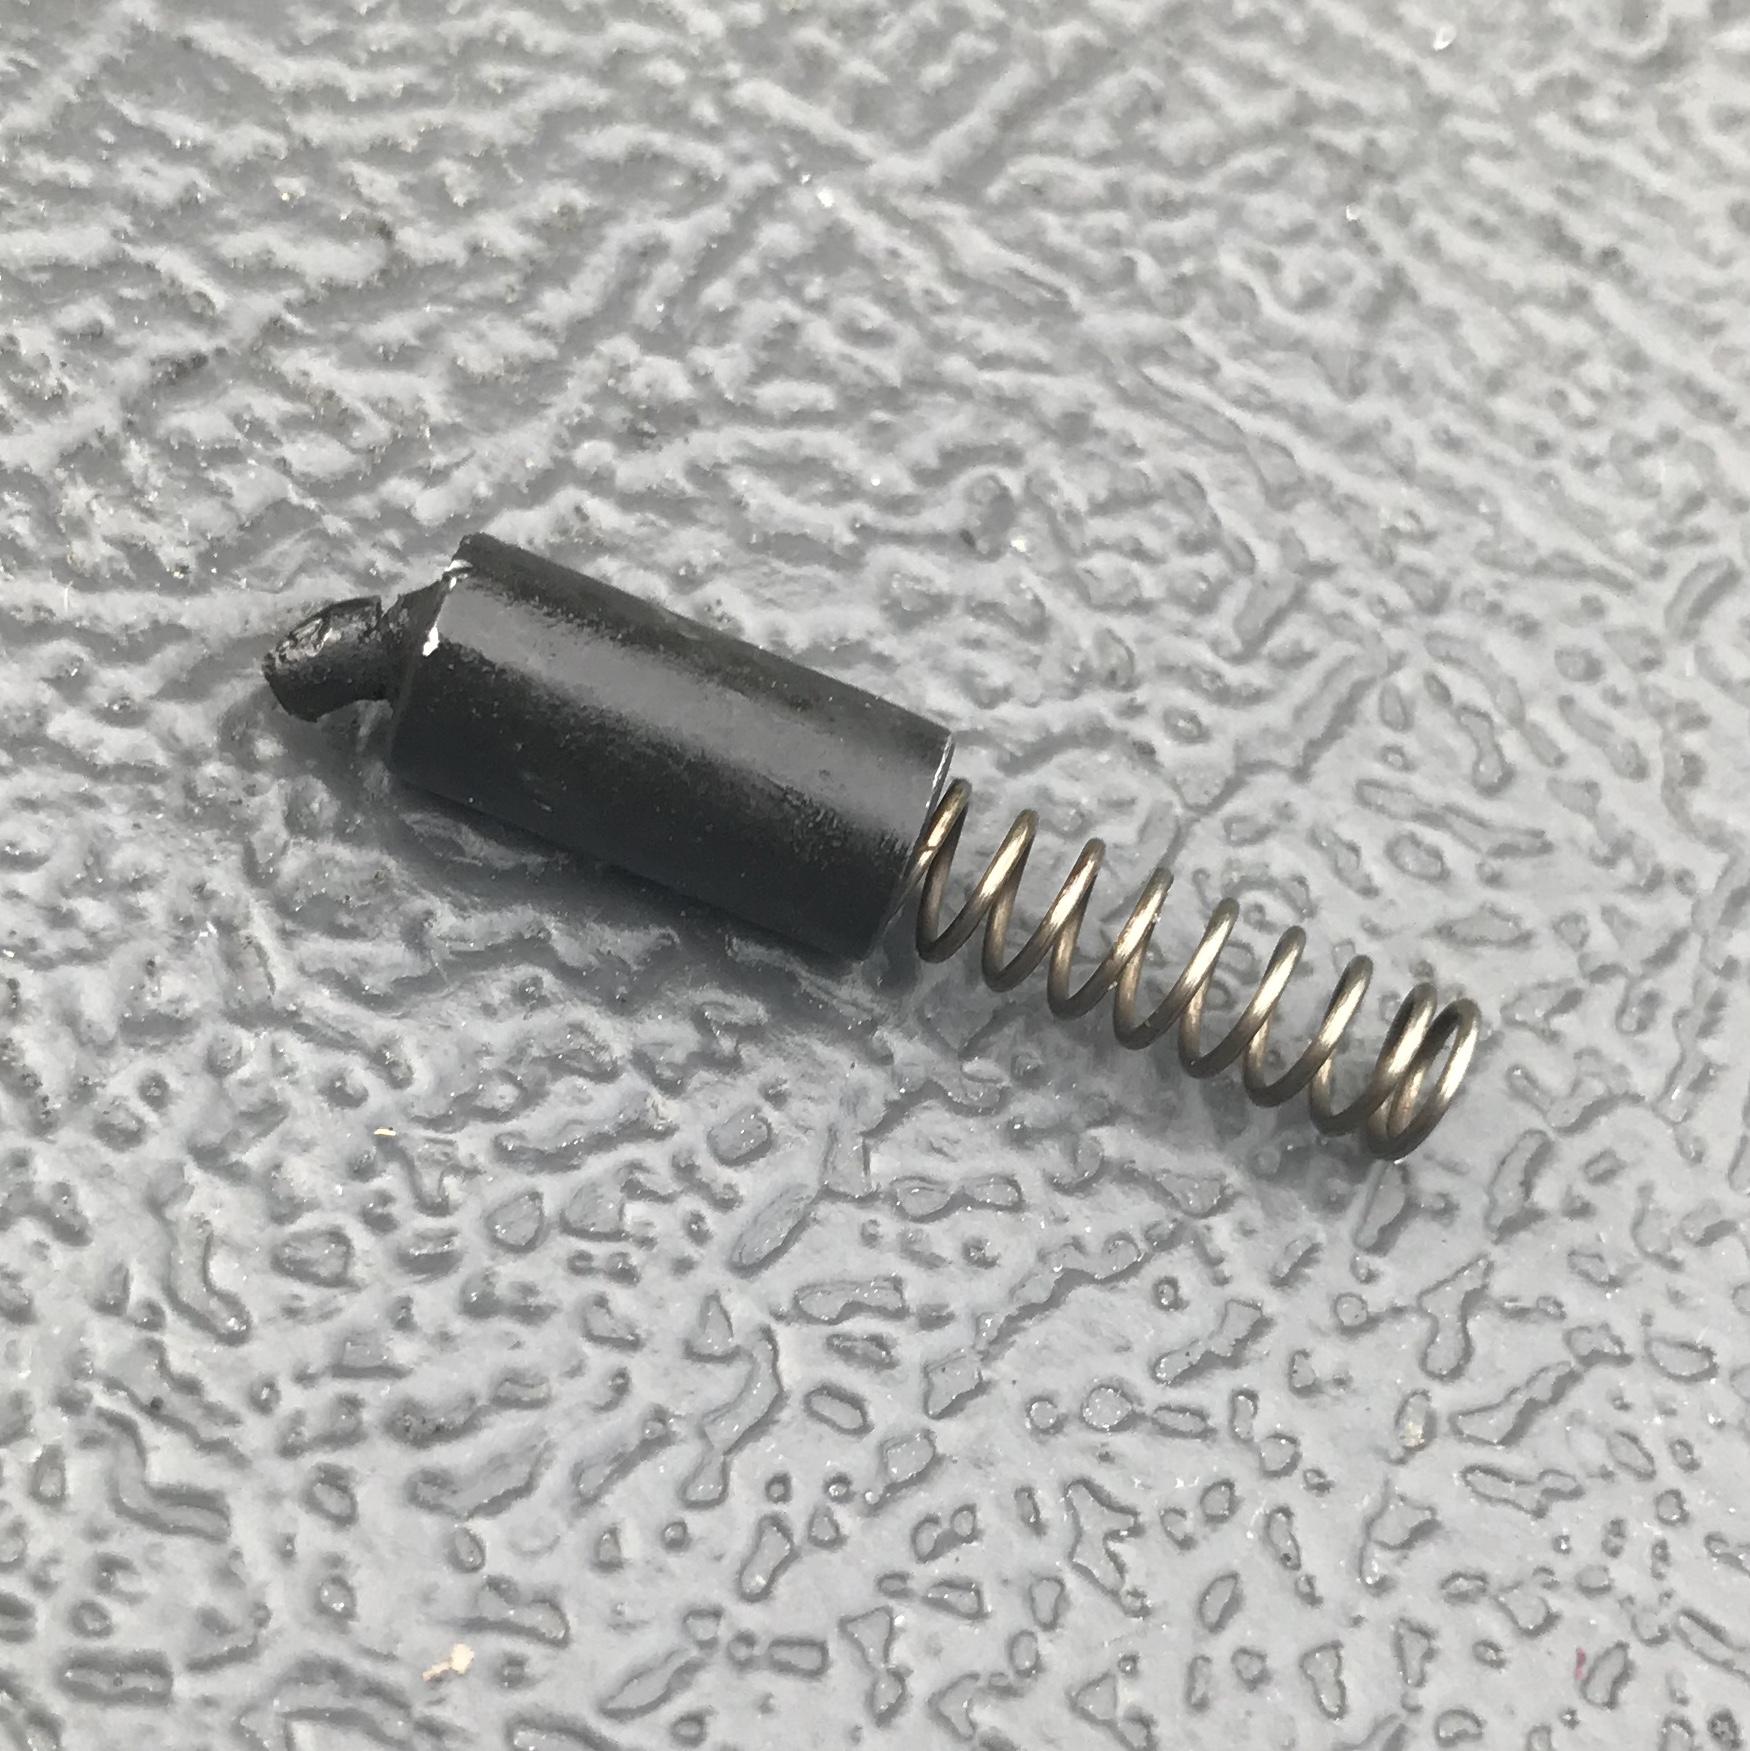
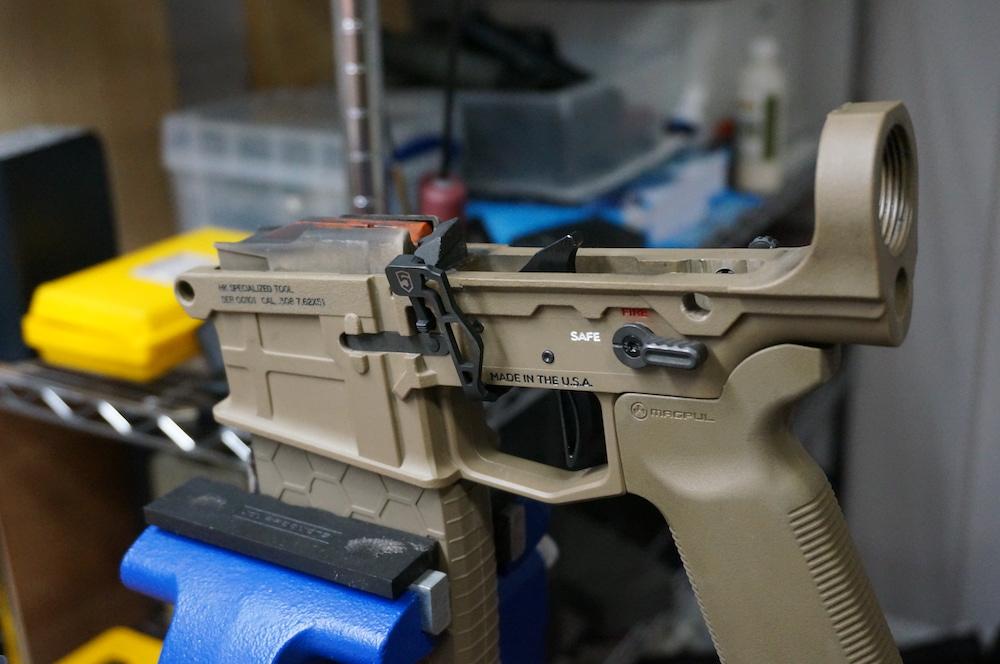
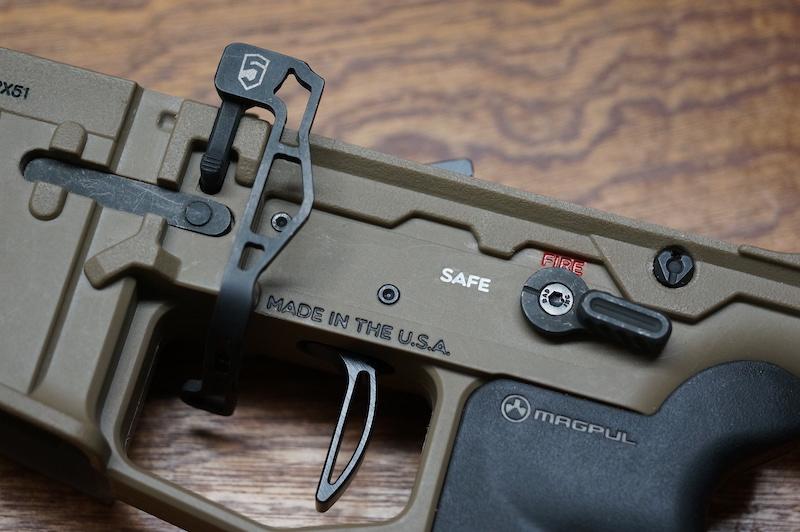
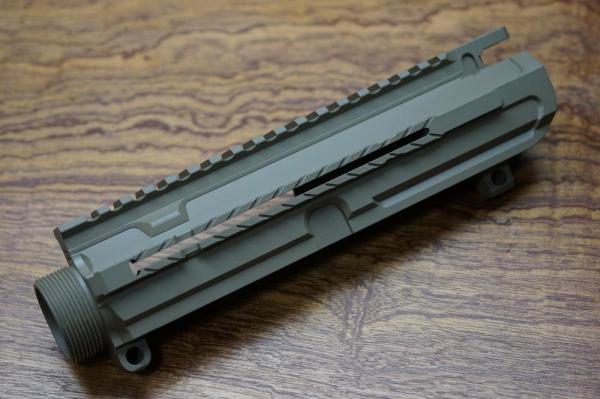
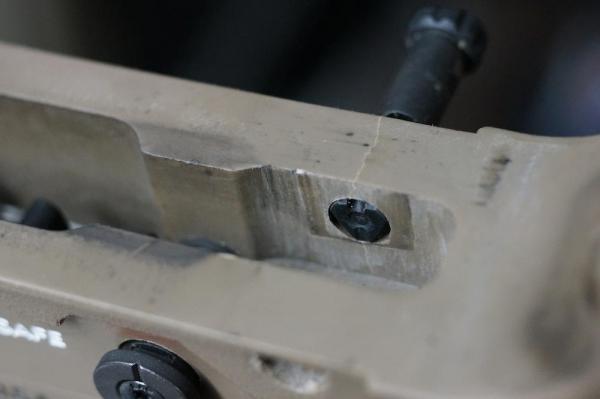
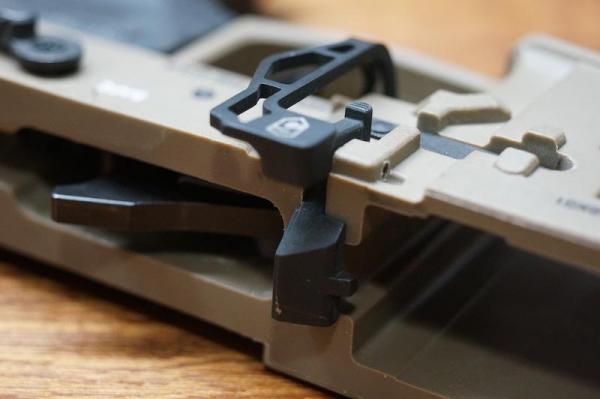
Some last minute things I forgot to include: If you look at the receiver where the side charger goes. You’ll see what looks like Cheverons going down the bearing surface. I believe those are relief cuts for debris to fall into if the rifle should ever get dirty. Good thinking if you ask me! The side charging handle is made up of four main parts. You have the slide, Handle, Pivot Post, and spring (I made up some of these names). The hardest part is removing the two screw on both ends of the pivot post. Both screws are installed with permanent Locktite, so I had to take a cutting wheel and cut a slot big enough for the blade of a standard screwdriver on both ends. Some heat would have helped here but I managed. Proceed with caution in this case if you decide to take it apart. This forum doesn’t afford much opportunity to edit posts does it?
-
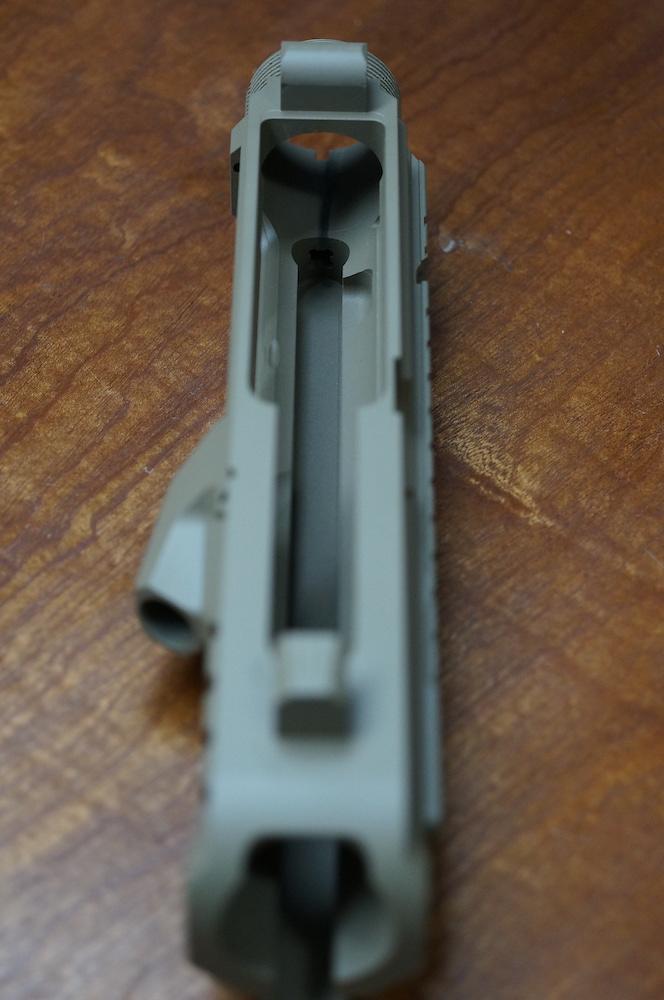
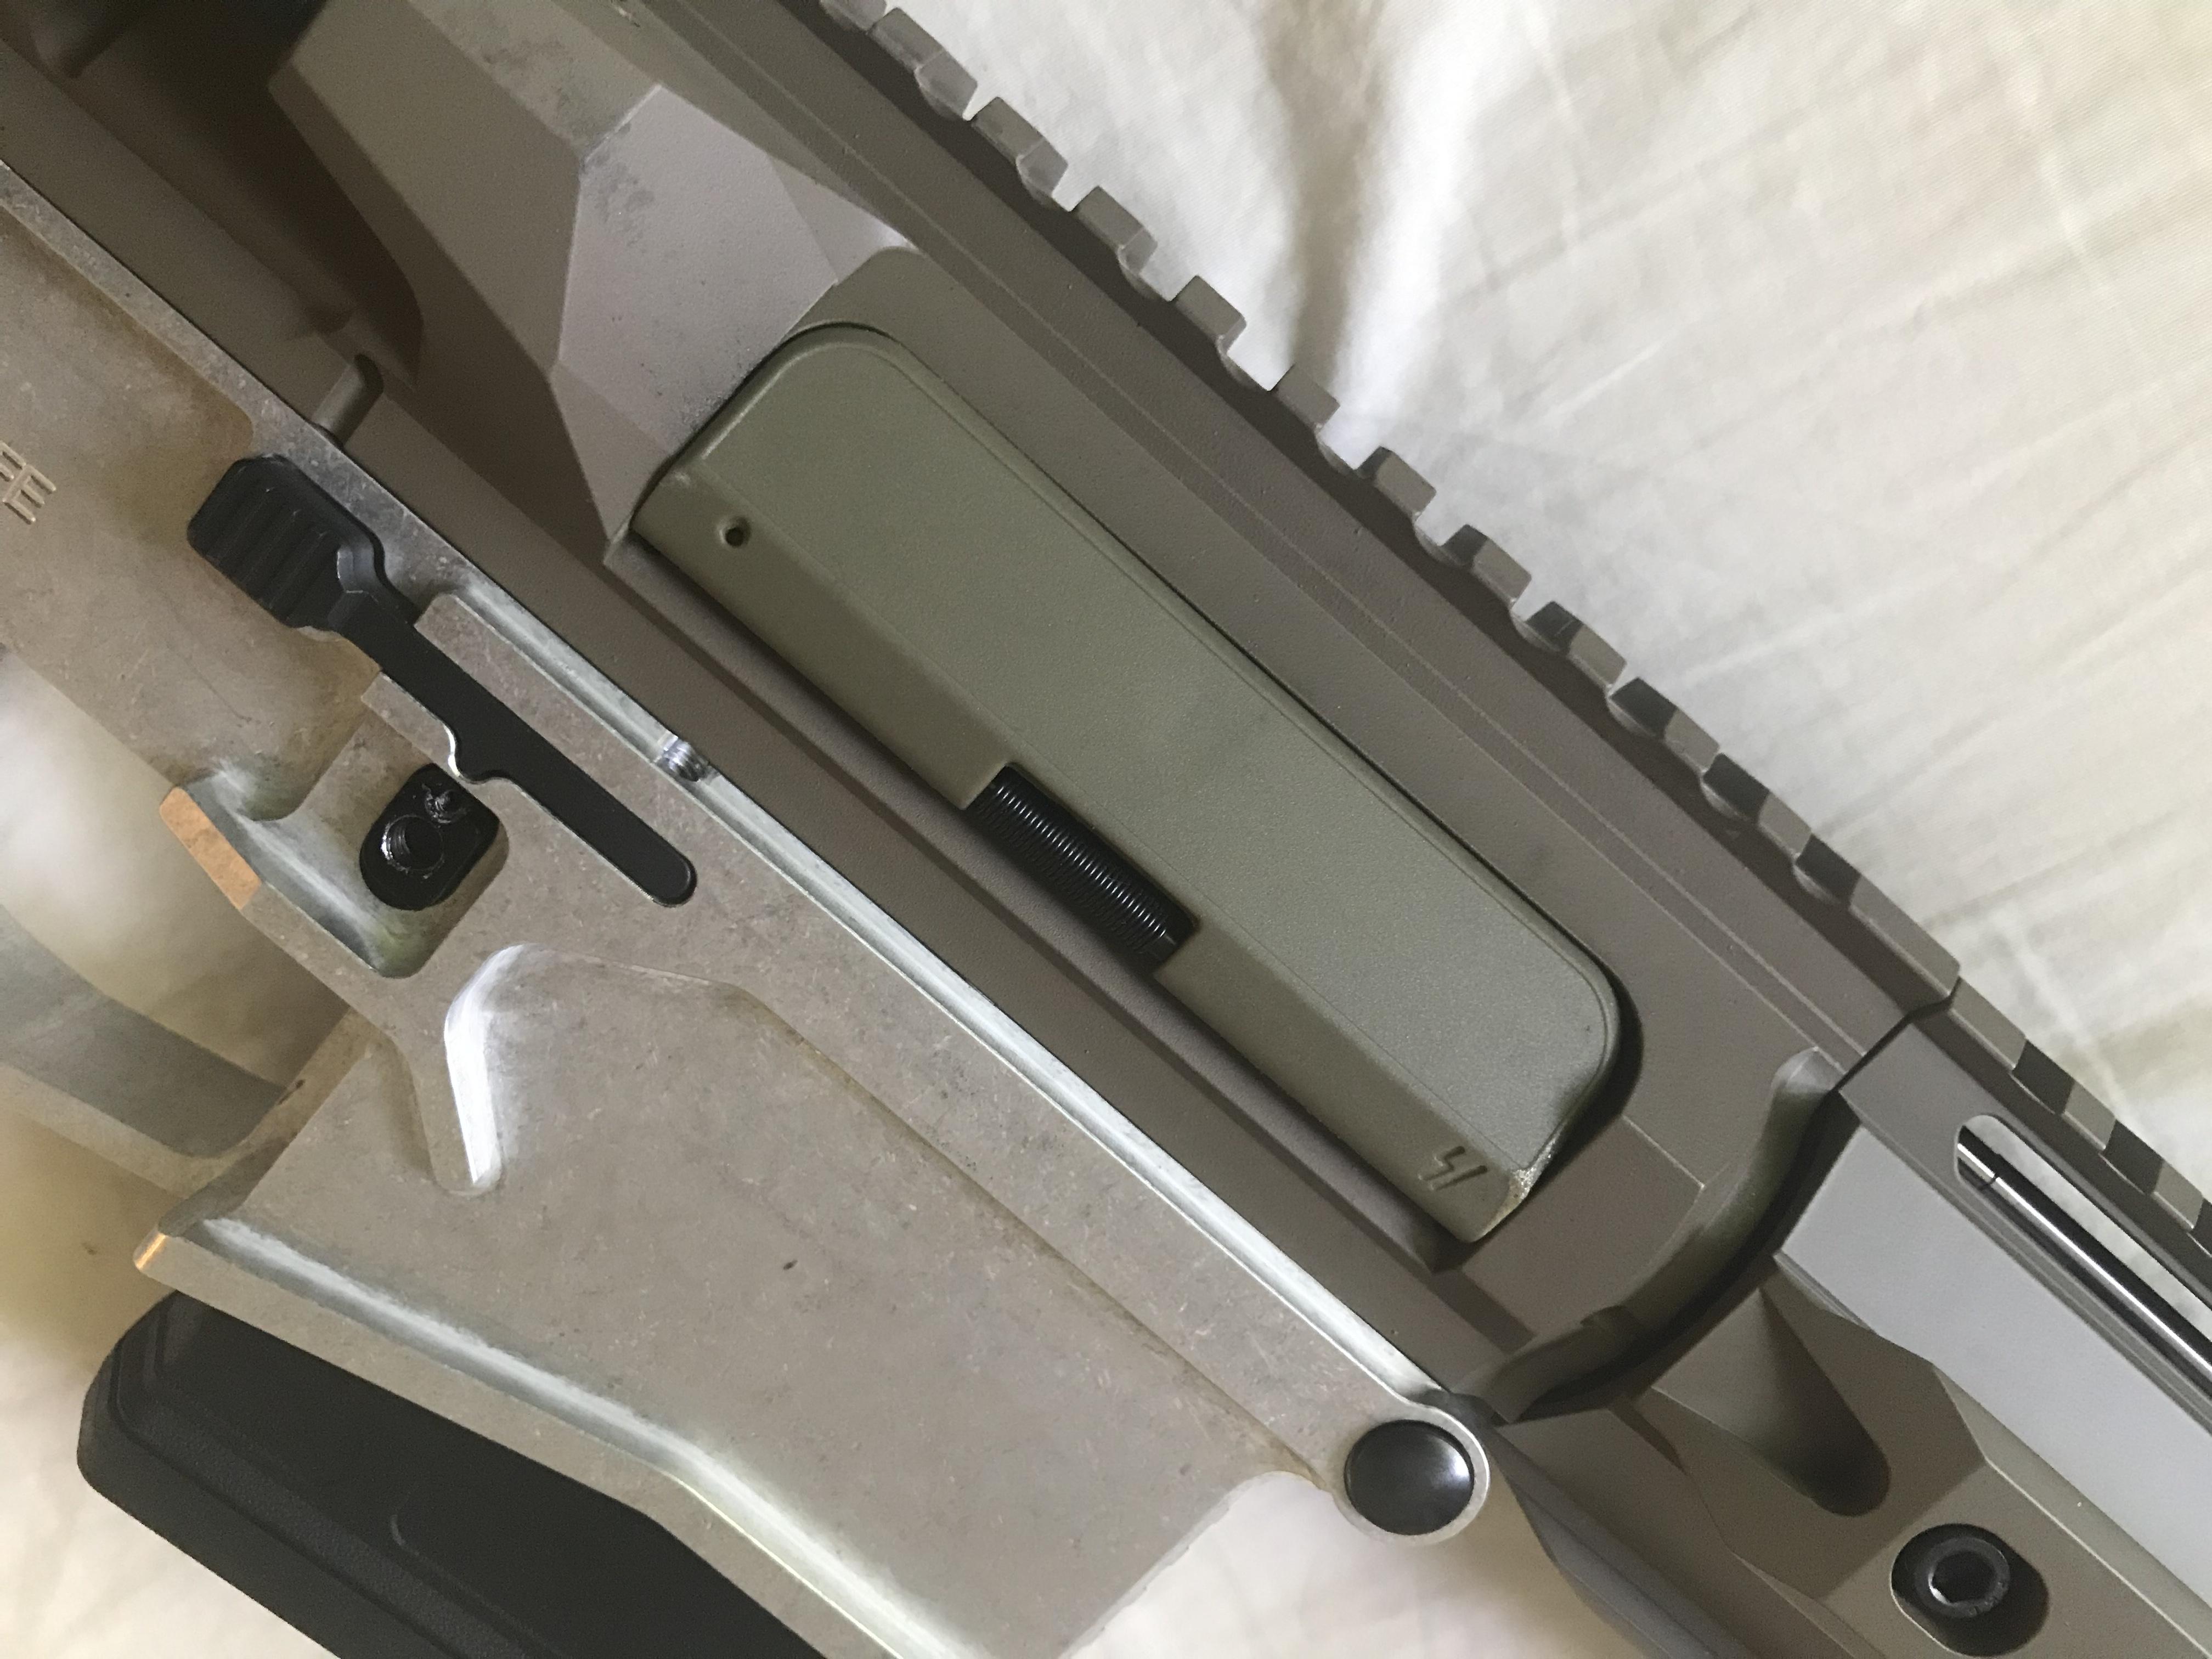
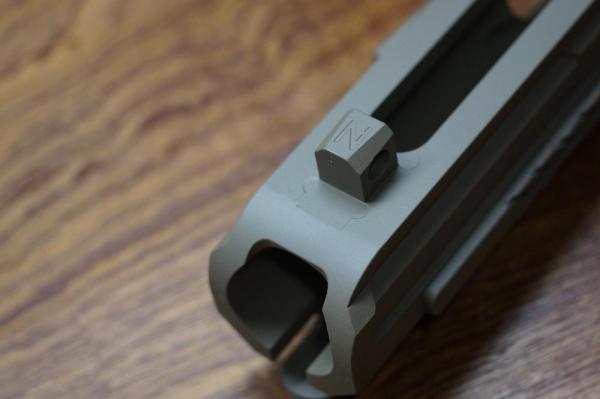
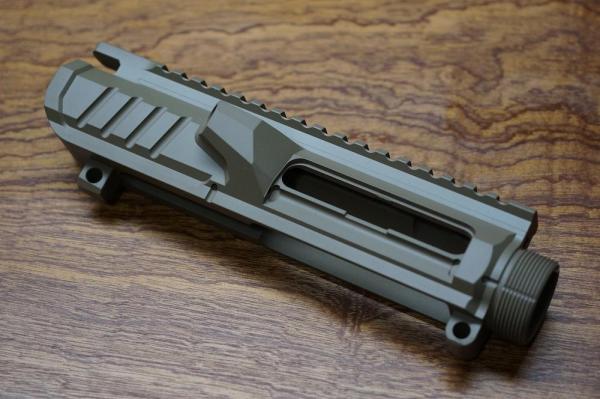
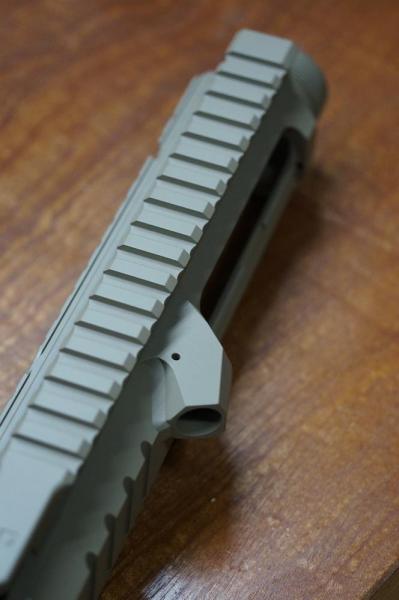
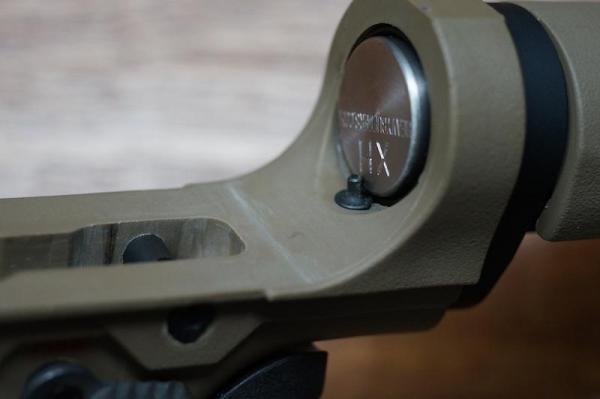
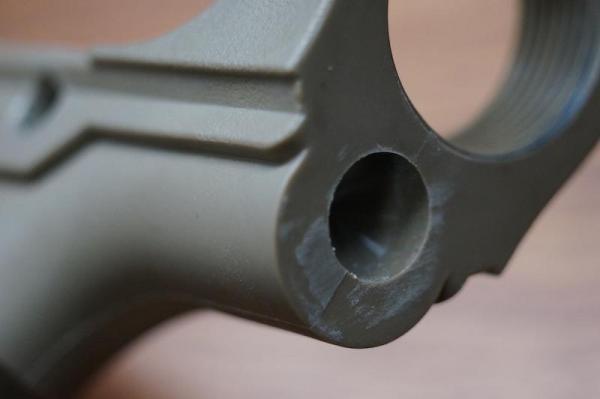
Just thought to drop a review on this upper. There doesn’t seem to be much I formation out there so I thought to share. Just at disclaimer, I’m just a amateur enthusiast so there’s always a chance that I’ll be wrong in my assessment. So please correct me if i’m Wrong. This is the JP Enterprises PSC-19 non-reciprocating Side charging upper patterned after the DPMS LR-308. The first thing I noticed was the beautiful machining and how the side charger glided on the upper. It’s a very attractive upper with all the bells and whistles. Now normally it comes with their Low Mass Bolt Carrier, but I specifically asked for their Full mass Bolt Carrier. They obliged my request without question (Awesome service!). The BCG seemed to glide in the upper as if it were a combination of glass and butter if there’s such a thing and that’s without any kind of lubrication! This isn’t my first side charging AR style rifle. I also have AR9 with a Gibbz side charger. Gibbz also makes a 308 side charger that looks pretty good, and I wouldn’t mind trying that out someday. This side charger is clever in design as it’s amazingly low profile, smooth operating, robust, and large enough to handle without being to small. I’ve have other firearms that is side charged and if you didn’t place your hand properly or if you pulled in certain way they would bind and make it difficult to cycle. Not the case with this rifle unless you’re grossly out of alignment when pulling on the handle. I also really like the fact that the handle has a spring that keeps it tucked in the stowed position instead of swinging around. When the Charging Handle is in the stowed position, it’s pretty much locked in place as you’ll see in the pictures. There’s no chance it’ll shift around when operating the rifle. Just remember to stow the side charger in the forward position if you lock the bolt back. If you forget you still may get smacked when you release that bolt. On an AR15 it would sting, but a 308? It will probably leave a mark. Ok, that’s all the good stuff. Now for the challenging parts. JP only guarantees fit and function with their lowers (rightly so). So I can tell you from experience that it will fit the JMT Enterprises’s Equalizer Polymer lower (I do not recommend this lower), and it will fit the Juggernaut Tactical lower both with some minor shaping of either the upper, lower or take down pin. I would prefer shaping the latter just because I want to keep my upper and lower intact as much as I can and pins are replaceable. If you noticed the rear of the receiver, it appears to be “Beefed up” or thicker so to speak. If you have a lower that tapers off at the Receiver extension ring like many lowers do, it will look slightly out of place because the upper’s beefed up rear end will not match the lines of the lower. A bit of an eye sore nothing more here. In order to install a barrel, JP purposely undersized the barrel extension bore. This requires their proprietary “Thermo-Fit” installation process. From what I hear this process was a closely held secret but now JP has broadcasted this protocol on YouTube for anyone to see. Really it’s nothing more than taking a blow torch and heating the receiver up just enough to open the bore up. I’ve had some success with a Dewalt heat gun but a vise and blow torch makes things easier. It is a very very tight fit, and it’s supposed to contribute to accuracy. As far as I can remember I think the temperature was about 250’ F when the upper was ready to accept the barrel which pretty much slid in. Just make sure that the barrel is fully seated in the receiver because once it cools down it’s going no where fast! I don’t know what the process would be to fully seat the barrel if this is the case. I don’t know if a barrel nut could provide enough force to fully seat a barrel. I wonder what the procedure would be or remove the barrel? JP’s tolerances are very tight! I found this out after I had my upper Cerakoted by a certified applicator. The side charging handle had to have all the Cerakote removed on all the bearing surfaces, and barrel extension bore. There was absolutely no way around this. Other areas that were very tight is the gas tube orifice and take down tabs. If you have one Cerakoted, make sure the applicator (or you) masks off the Barrel Extension bore and all the bearing surfaces of the side charger to save yourself a lot of extra work. Stripping down this lower for Cerakote wasn’t difficult. The Forward Assist was standard but the dust cover pin and spring had to be destroyed. I had to very carefully take my Dremel cutting wheel and cut off the spring and cut out a notch on the dust cover pin so I could slide the rod out. Unlike the AR15 style upper, it looks like once the dust cover pin is installed, it’s pretty much permanent because there’s no way to get it out without destroying it. That’s why I replaced it with a Strike Industries dust cover. If there’s a secret that I don’t know about please share with me. Overall, I’m very happy with this upper. It’s slick, well thought out and very functional. Only major drawback is the price ($1200) but then again this is a package deal. You’re getting a hell of an upper, Premium Bolt Carrier and bolt (Valued at $445), standard charging handle, and a robust deluxe non-reciprocating side charging handle. If you do buy one make sure you’re ordering the correct upper. They have the SR25 pattern as well. I hope this helps some of you in the future.


-
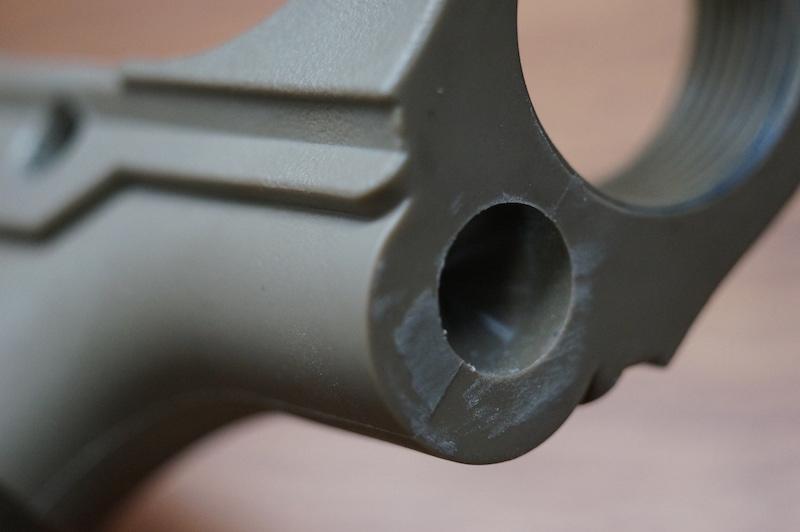
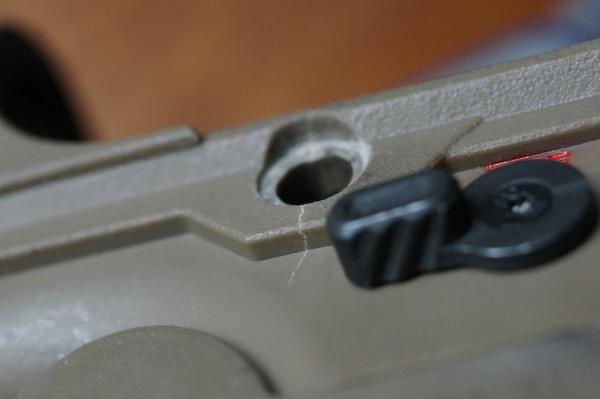
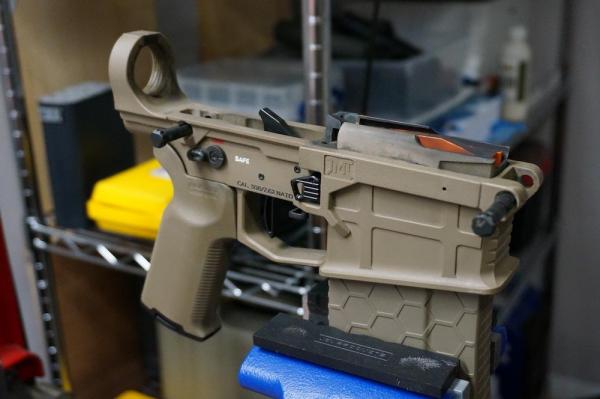
Hey all, just wanted to share my experience with a late model Polymer 308 lower. When I started this project, I was looking something in the 80% realm which is something I've always wanted to try. I was also looking for something that looked cool and in large caliber. Since Polymer construction has been around for a while now I thought I'd take a leap of faith that the technology and experience is up to the level where it could be used in applications like this. So I did some on line research and came up fruitless so I thought I should give it a try anyway. My rifle has a 18" 1/10 Criterion barrel with a mid length gas system. I'm using a heavy JP rifles Heavy BCG and a Extra heavy 308 buffer. I think the combined weight is 2 lbs. I'm also using a JP Rifles adjustable gas block. My rifle gas block is optimized for un-suppressed ammunition. Constructing the lower wasn't easy as there no such thing as "Milspec" in the 308 AR world (as far as I've researched). So I had to pretty much custom fit my lower to the parts I have. After my labor of love (So to speak) I field tested my rifle and went through a total of 100 rounds of assorted brands of 308. My rifle pretty much operated well with the exception of me lubricating everything but the BCG causing a failure of return to battery, and the Buffer weight detent leaving it's rightful place in the receiver extension ring causing a misfire at the 80th round. It was pretty much a good day. The next day I stripped and inspected my lower and found a couple critical issues. First thing I found was the Receiver Extension ring threads were stripped, isolated to the lower portion of the ring. I think that was the culprit for the Buffer detent leaving it's spot causing the misfire I had. Second, I found a crack right above the Rear Take Down pin that propagated down working toward the handle on the right side. When you look at the pictures, you'll see an unusual amount of carbon build up after 100 rounds. I shoot suppressed 98% of the time to be a good neighbor. So this build up is something I'm familiar with AR15's. The other thing I'd like to mention is the rifle's action felt very smooth. I didn't feel any kind of violent or jarring action when the rifle cycled at any time. I've shot other AR 308's in the past and this rifle felt smoother thanks to the wealth of knowledge from this forum. So in my personal opinion my rifle was working fine, so you'll have to pretty much take my word for it and trust me. I'm including a you tube video clip of my field test so you can get an idea of how the rifle was operating and the pace I was putting it through. If you're curious my lower is made by James Madison Tactical. There is a "Limited Lifetime Warranty" but there are a few caveats involved. I won't get into it here but ultimately I don't want to go through the trouble of custom fitting my parts all over again, and spending the time & money to test it all over again to most likely get the same results. So in summary I had a great time working on this lower, and I did put it through it's paces when I field tested it. Looking at then end result I don't think I would ever use a Polymer lower again. If you ever plan on trying one out or if you already have one, I would highly recommend stripping it down and giving it a through inspection every 50 rounds and be very careful. Honestly I wouldn't go near one ever again. I hope my personal experience will help some of you in some way. Be safe out there!


-
Thanks, always wear Eyepro! 🤓
-

First 308 AR build and questions about Juggernaut's Rail
haewired replied to haewired's topic in Building a .308AR
It was a fun experiment. I’m looking forward to getting my next Aluminum lower up and running! -
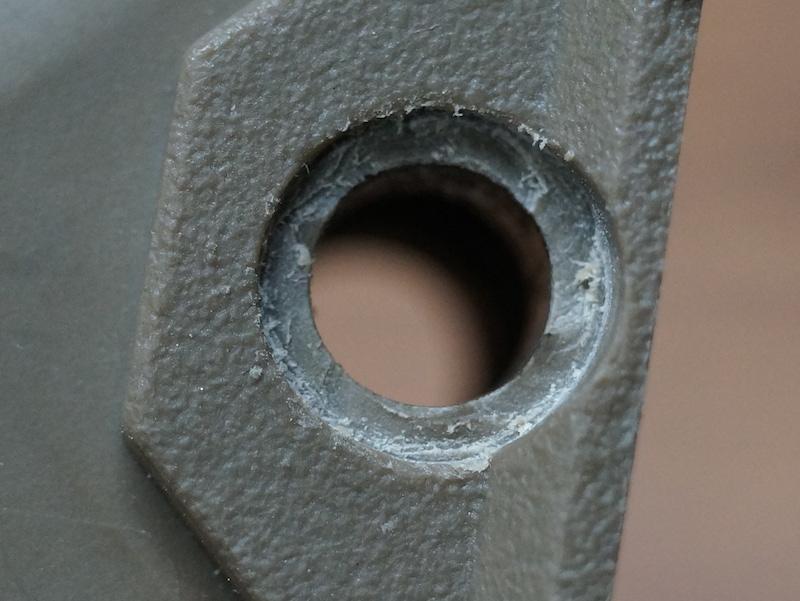
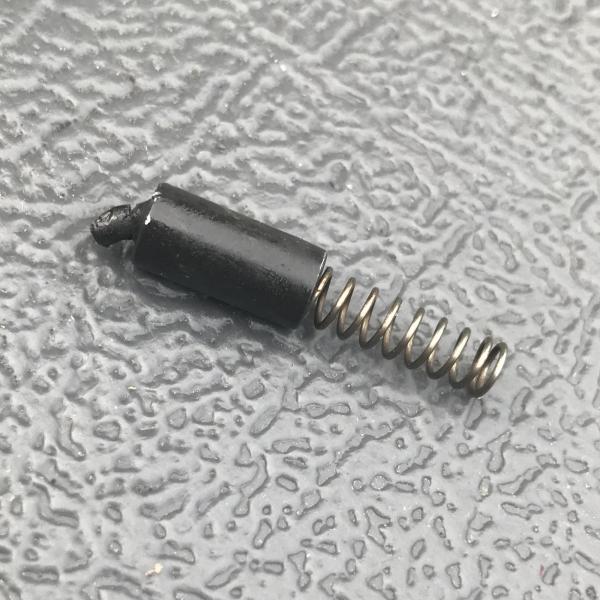
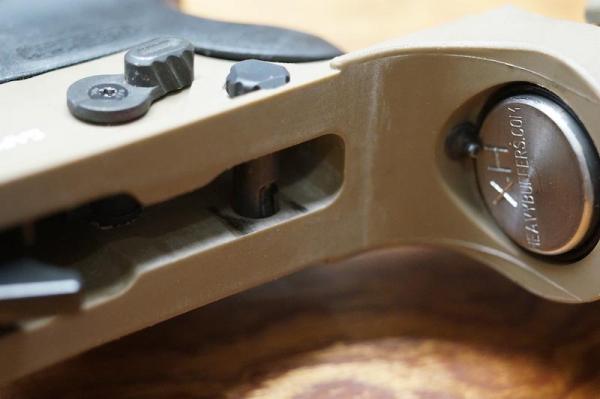
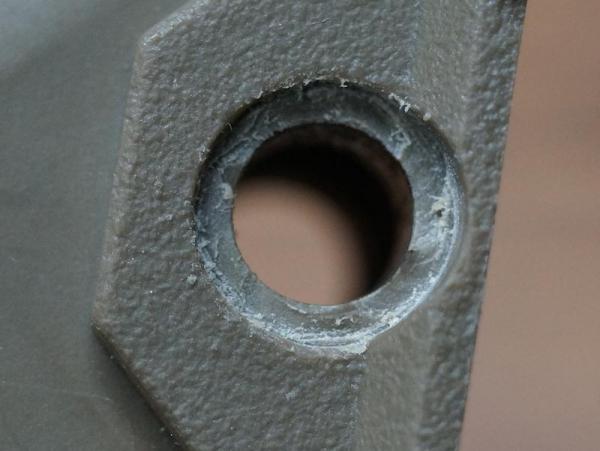
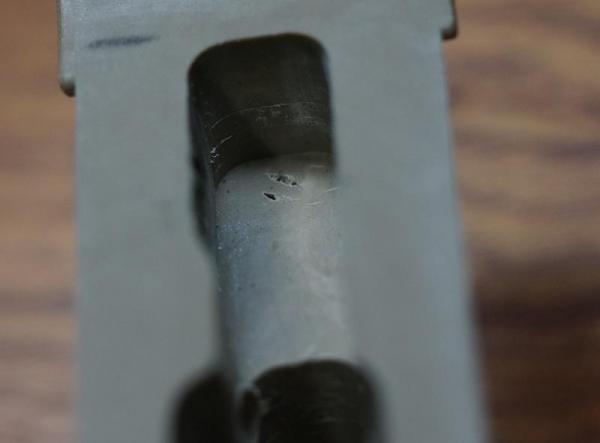
Here’s a pic of the buffer retainer detent. I thought this was due to the fact that the receiver extension barely engaged the detent. Now instead I believe that lower polymer had enough flexion when fired to cause tolerances to open up damaging this part. This caused a misfire and when I took apart the upper from the lower it just fell out and the buffer assembly popped out.
-
Yes, there’s a limited warranty as long as it was used under ”Normal Use” and as long as the damage isn’t adjacent to a milled or drilled area. To be honest, I don’t want to trouble myself with going through the paperwork process, and building process all over again for it to fail. This was a fun experiment at best, and if it held up to the punishment of the 308, then awesome. I’ve never built a 80% lower before and now I’m graduating to a aluminum lower. After this case I don’t think I’d ever consider a .308 Polymer lower for serious use. Magazine is brand new. I shoot suppressed 98% of the time as my family’s property has other houses nearby. I like to be a good neighbor = ]. From my experience shooting AR15’s without a adjustable gas block, that carbon you see is completely normal in my opinion. I concur sir! I have a JP Rifles adjustable gas block installed and it’s optimized for unsuppressed operation. Shooting suppressed will cause more back pressure but with a adjustable gas block it mitigates a lot of the gas that vents through the back of the receiver to the shooters face. It also prevents the early wear and tear of the rifle and associated parts. Thank goodness for adjustable gas blocks! As far as the action is concerned, I didn’t feel any violence or jarring motions when firing my rifle. The action felt smooth without any kind of a smacking feeling at all. Now I did have a few rapid fire events to check for functionality. I don’t think this lower or any polymer lower will be handle this course of fire. I don’t know if JMT Enterprises would consider that “Normal Operation”. After this experience, I would say that if you want to try to build a polymer lower and you plan to shoot 20 rounds a year it’s fine. I however would highly recommend a complete stripping of the lower and inspection after every 60 to 80 rounds. I can’t speak for AR15 Polymer lowers though.
-
I just received my "Raw" 80% lower from Juggernaut Tactical. I have plans for that lower, and I guess I'll be writing a review on that one too since I haven't seen one just yet.
-
First 308 AR build and questions about Juggernaut's Rail
haewired replied to haewired's topic in Building a .308AR
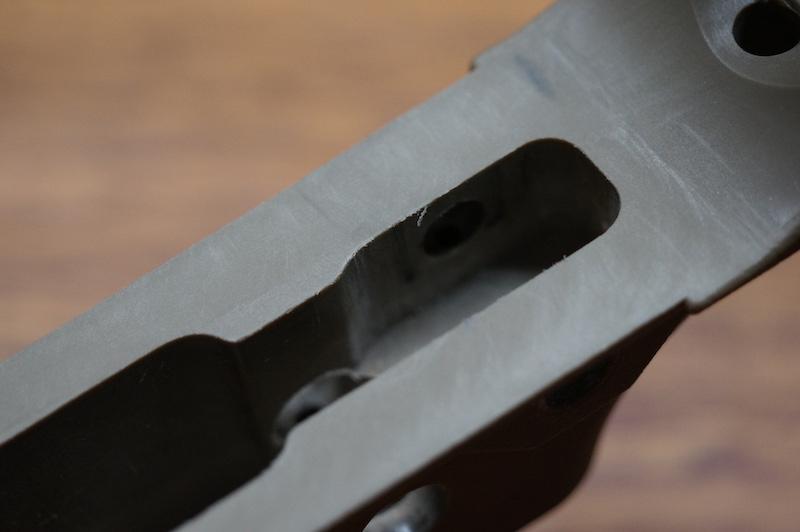
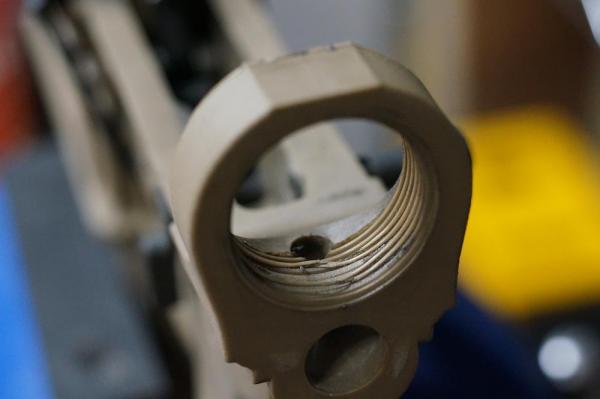
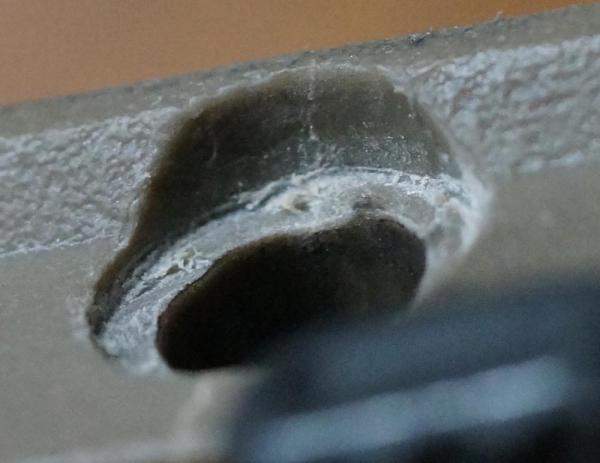
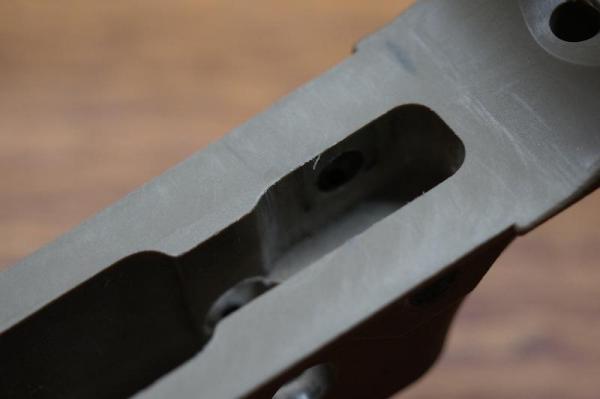
Ok, I put 100 rounds through my rifle yesterday and took my rifle apart for cleaning and inspection. What did I find? My lower failed by cracking and stripping threads at the buffer tube. You'll see in the pictures that the receiver extension ring threads are stripped out. That explains why I had a misfire because the buffer retention pin broke loose at the end of the day. Next you'll see a crack on the right side of the receiver starting from the top of the receiver above the take down pin, propagating down past the takedown pin and working its way to the handle. I kinda expected this, but I had some hope that this polymer receiver would be the exception. It was fun to build and I wanted the experience to make a functional 80% lower. As far as I'm concerned it's a paper weight now. I'm glad I didn't have a catastrophic failure while operating the rifle, and I'm happier to have learned about this experience and share it with you all. I plan on posting another thread on this warning about this lower and any other poly lowers with a round count of over 100. If any of you have a poly lower with a round count over 100, I highly suggest you inspect your lower. Well, it's a good thing I ordered a "Raw" 80% lower from Juggernaut Tactical. There's my next project!


-
Ok, I put 100 rounds through my rifle yesterday and took my rifle apart for cleaning and inspection. What did I find? My lower failed by cracking and stripping threads at the buffer tube. You'll see in the pictures that the receiver extension ring threads are stripped out. That explains why I had a misfire because the buffer retention pin broke loose at the end of the day. Next you'll see a crack on the right side of the receiver starting from the top of the receiver above the take down pin, propagating down past the takedown pin and working its way to the handle. I kinda expected this, but I had some hope that this polymer receiver would be the exception. It was fun to build and I wanted the experience to make a functional 80% lower. As far as I'm concerned it's a paper weight now. I'm glad I didn't have a catastrophic failure while operating the rifle, and I'm happier to have learned about this experience and share it with you all. I plan on posting another thread on this warning about this lower and any other poly lowers with a round count of over 100. If any of you have a poly lower with a round count over 100, I highly suggest you inspect your lower.


-
First 308 AR build and questions about Juggernaut's Rail
haewired replied to haewired's topic in Building a .308AR
I’ll add some more comments later but here’s a synopsis -
First 308 AR build and questions about Juggernaut's Rail
haewired replied to haewired's topic in Building a .308AR
-
First 308 AR build and questions about Juggernaut's Rail
haewired replied to haewired's topic in Building a .308AR
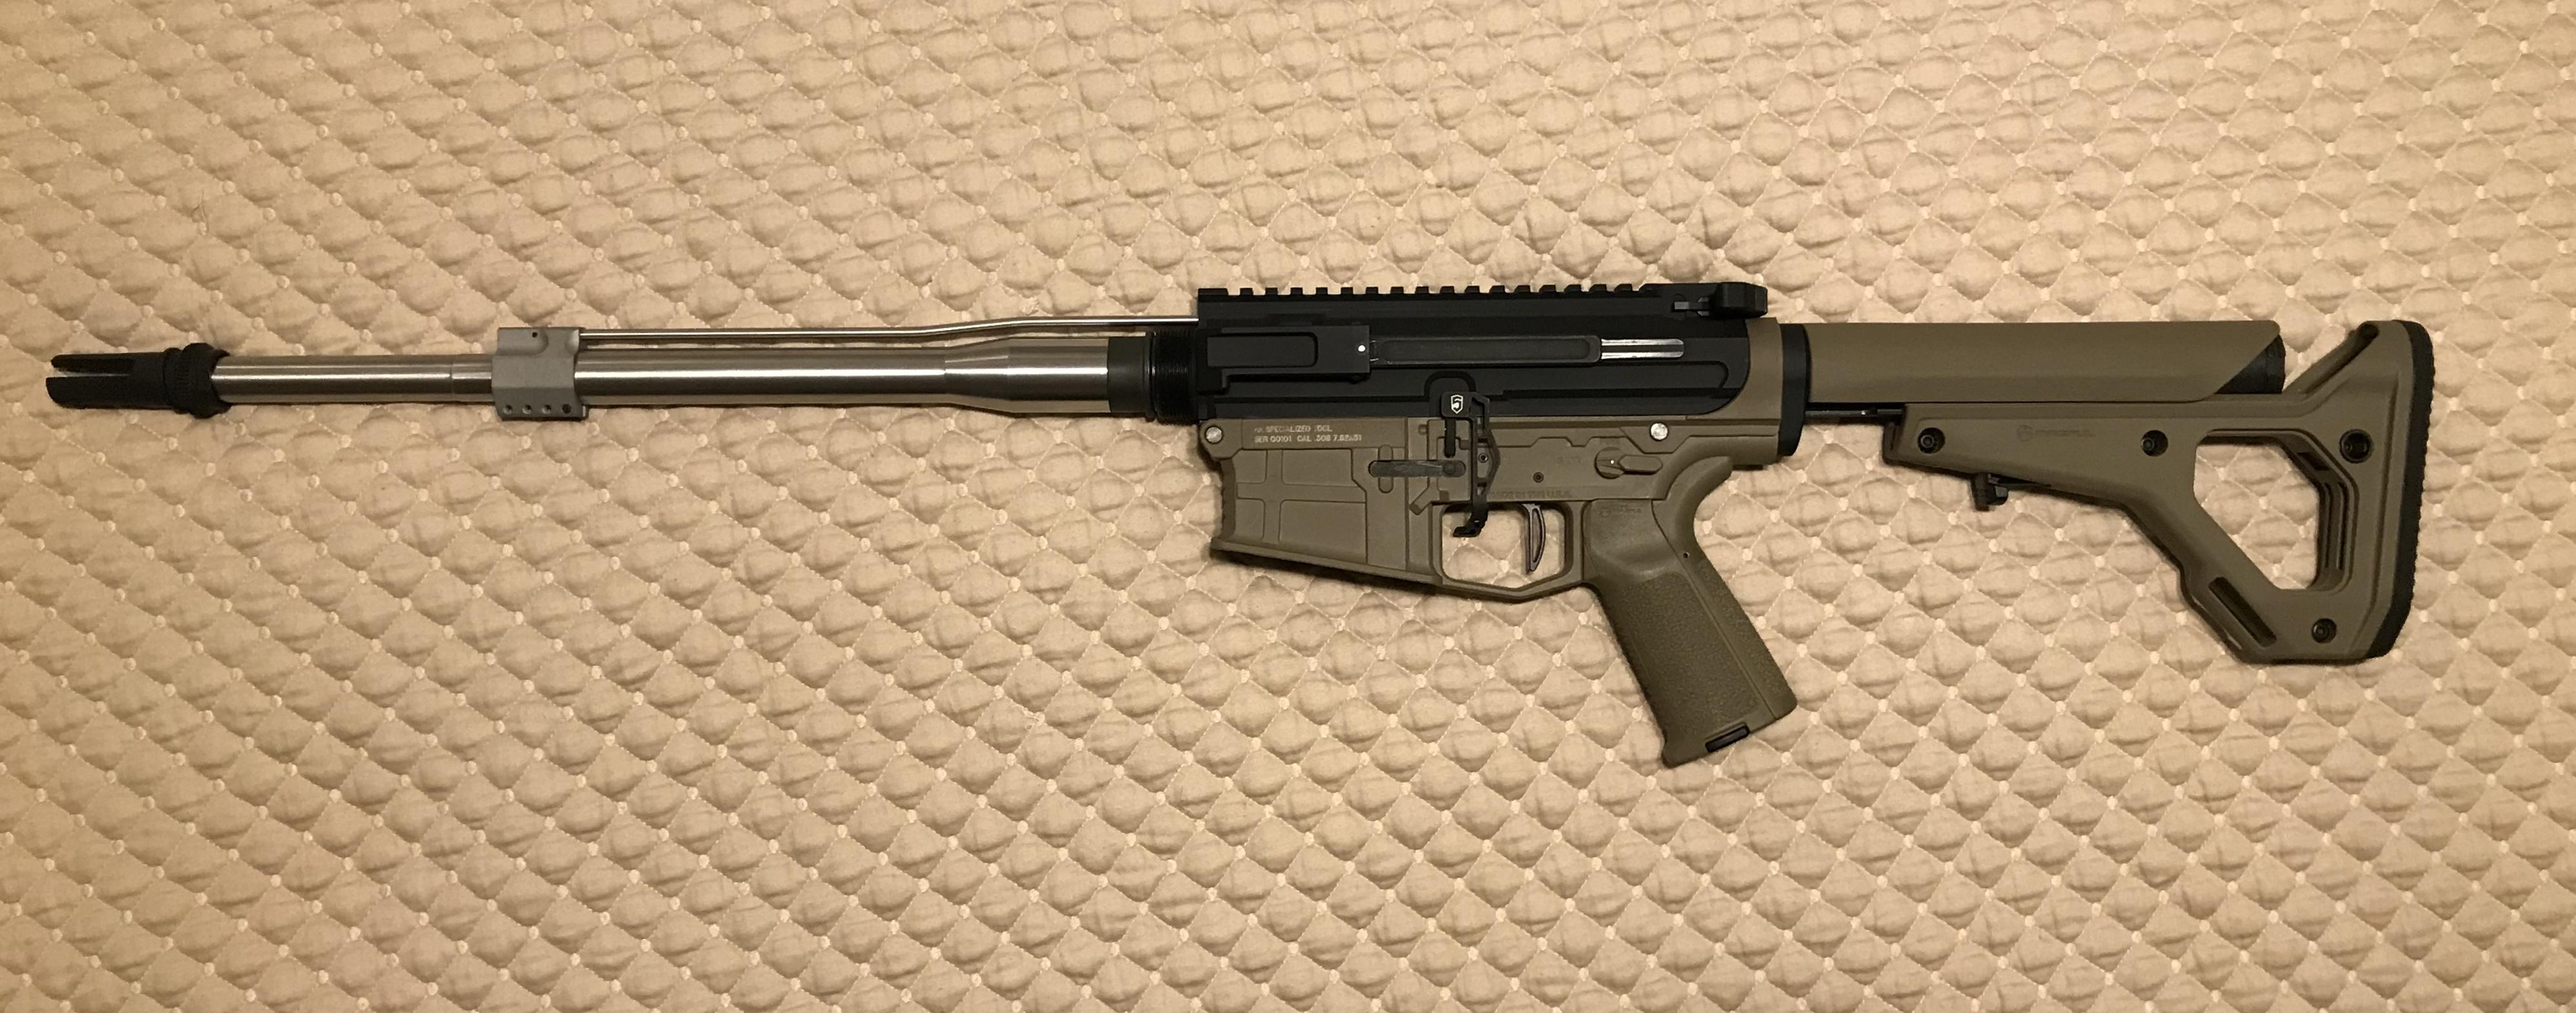
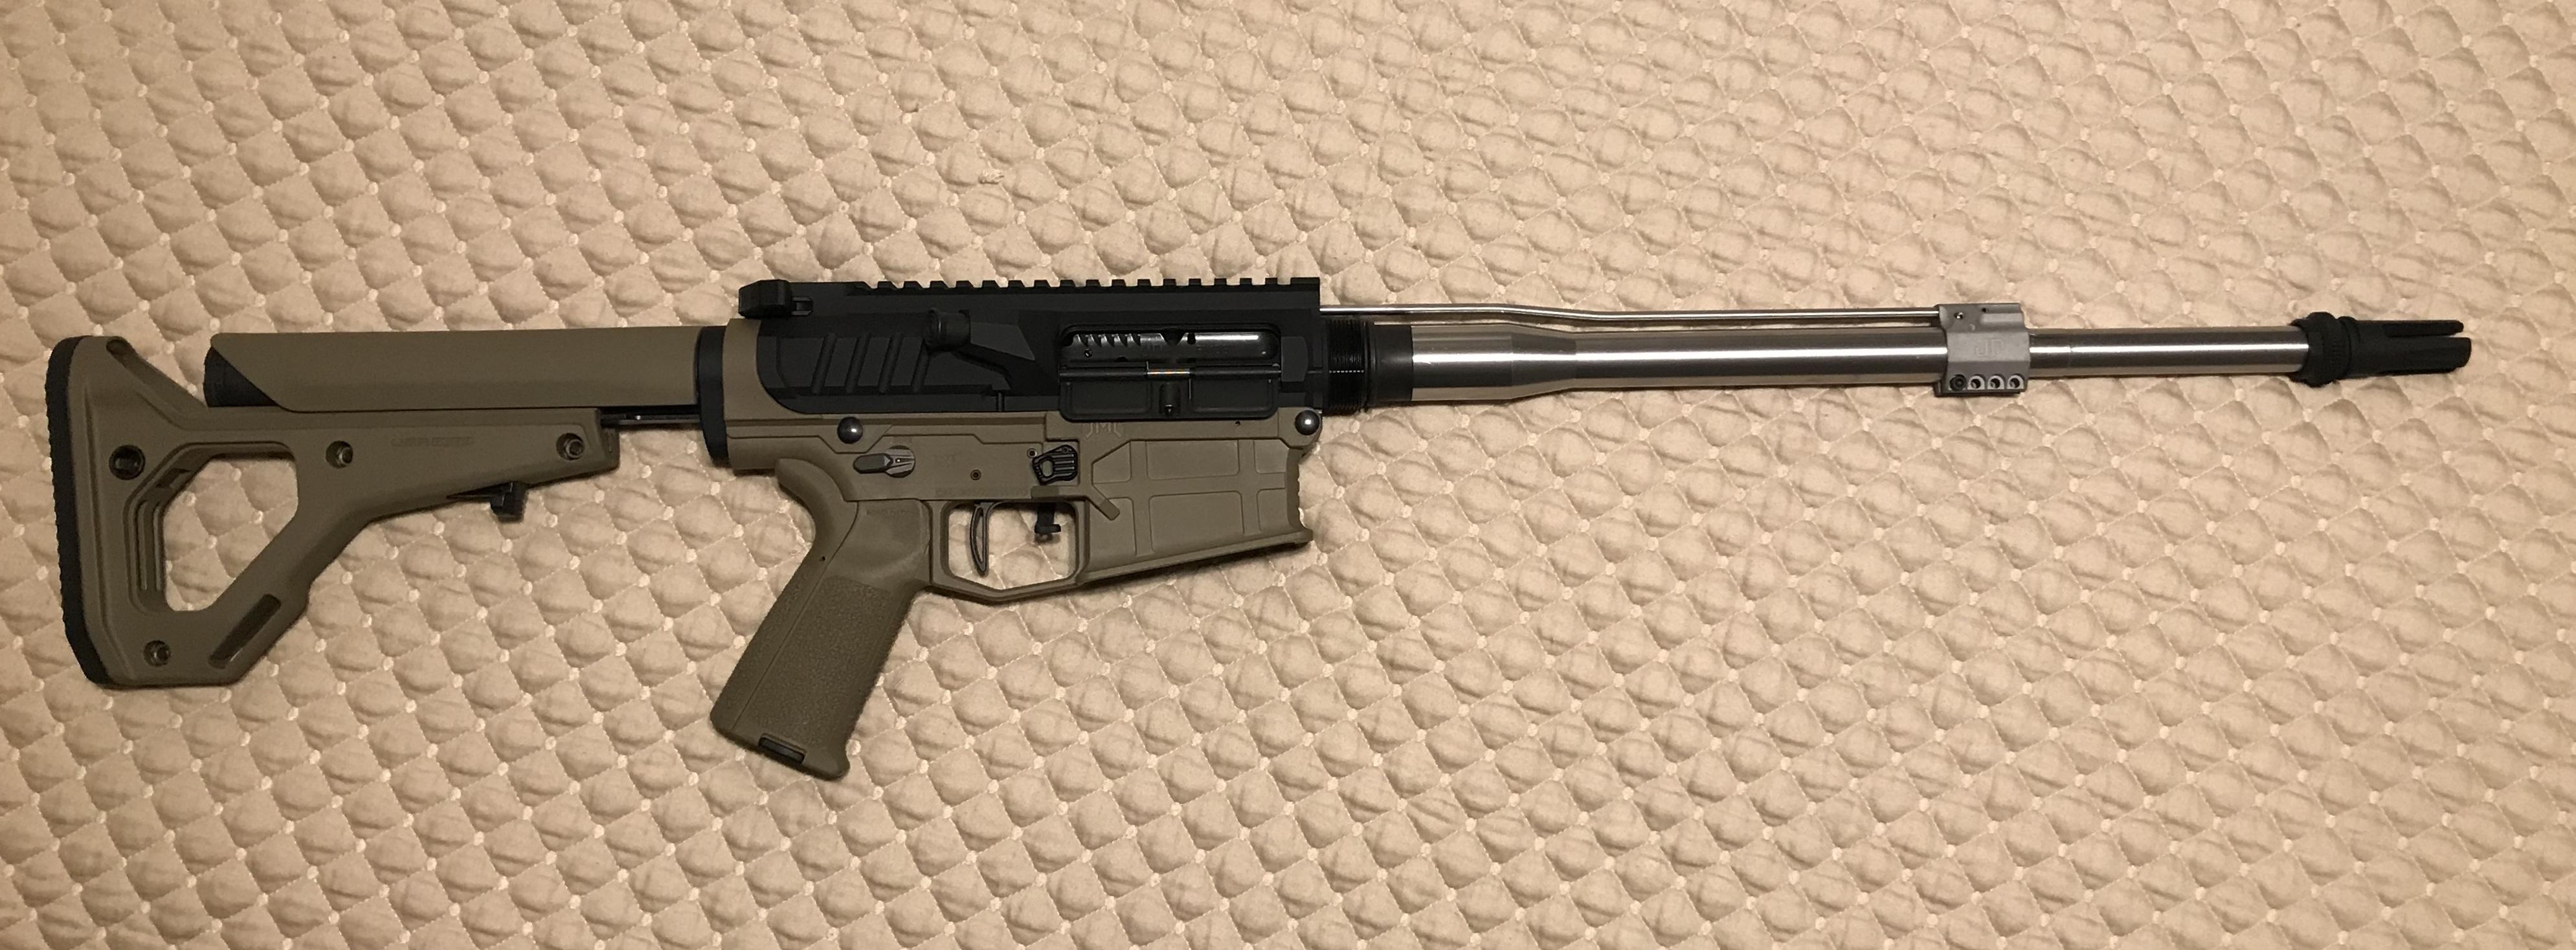
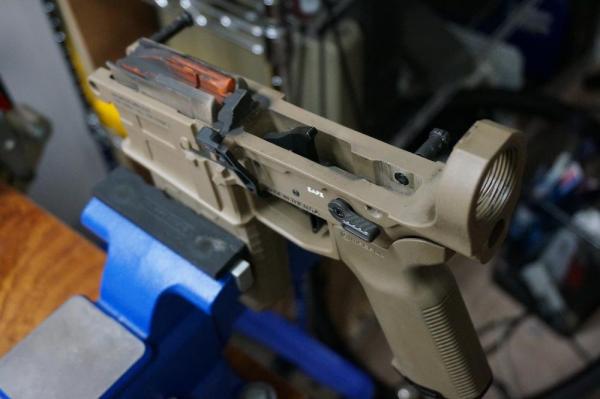
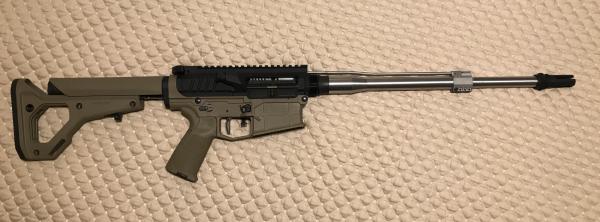
All done! Now I have to test it out! the whole package without the magazine is 10.6 lbs. A bit heavy, and the stock doesn't help here but she's balanced.
-
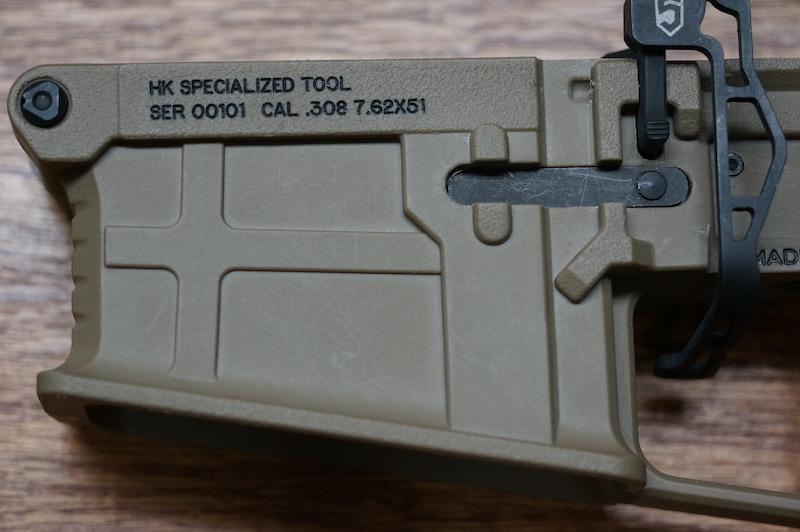
Couple things I forgot to mention is the lower has brass reinforced threads for the handle that is press fitted in and the engraving on the magwell was my addition to the receiver. I had to carefully dig out the shavings from each letter with a dental pick so be careful if you do the same to a poly lower. Range report later on this same thread when I get a chance.
-
here's the finished product. After all that fitting, I polished off the sanded areas with finer sandpaper and stepped up the grit all the way to 1500. Rough areas will catch dirt and grit faster than a smooth surface of course and it looks refined. All in all I like the way this upper looks and the tight tolerances makes this a pretty solid feeling lower. I don't know how it'll fit up with other uppers but that's the fun with .308 AR's as nothing is really "Milspec" in this realm, I'm quickly learning. My main worry is if all this work was for nothing if it can't hold up to prolonged use and shock from the .308 round. My advice to anyone who wants to try a polymer lower is be prepared to custom fit your lower to everything aside from the trigger and safety.


-
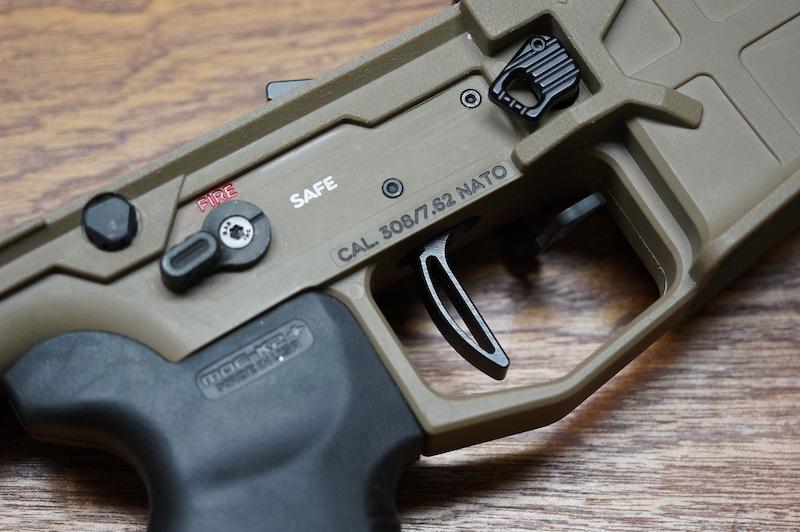
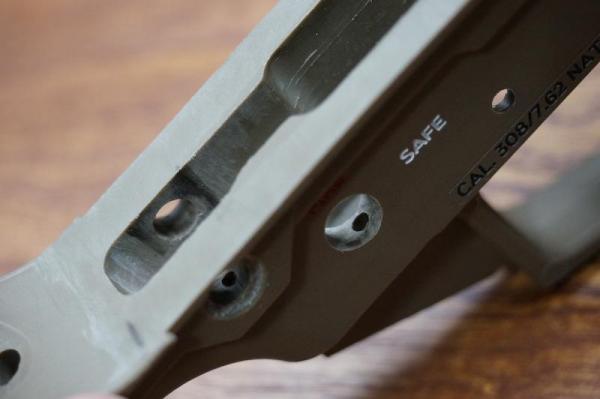
Ok everyone, here is my first review. Just a disclaimer here and I want to stress that I'm nothing more than a enthusiast. Never went to a armorer's course or tactical class, I just like to tinker and have a passion for firearms. I think they're really cool machines and I like to share my experiences so others can learn from my mistakes. This review will have two parts, part one will be about assembly fit and function. Part two will be a short range report when I have a chance to visit the range. This is my first 80% lower and it's polymer made by JMT the ".308 Equalizer". Their selling point is their "own formula of hybrid polymers and fibers with additional reinforcements in high stress areas". They also sell that their lowers are "engineered to Mil Spec tolerances" (quotes from their website). The tools I used to mill out the cavity was a router and the Easy Jig Gen 2. The upper I'm fitting this lower to is a JP side charger and I'll be putting out a review on that later. The first thing I do with a lower is fitting parts, it's a habit I have and I like to see if things fit. I don't know how it is for other 80% or even 100% polymer lowers but every part would not fit unless you forced it in with excessive force. so every pocket needed to be custom fit with jeweler files, rotary tool, or 220 grit sandpaper. It took a lot of patience with my calibrated eyeball and hands to get things right. In the pictures below you'll see where I hand to make adjustments. The largest adjustments I had to make was at both take down pins. Fit of the pins were too tight and only one of the detents would engage when you pulled the pins out but when you fully engage the pins the detents will not click into place. Maybe I'm being compulsive about this but I want to be sure the detent is fully engaged keeping the pins in place and not just friction. So I used my dremel, steady hands, and nerves of steel to carefully remove as little material as possible. I used a round file to open up the openings. The Bolt Catch slot and Magazine catch had to be slightly widened with a putty knife and sandpaper folded over the edge. Constantly shaving and fitting parts was the key here. The other issue here is when you install the Bolt Catch Pin, you're going to have a heck of a time getting it out if you need to replace it. there isn't a lot of room to get that pin out. The JP upper's take down anchor was binding in the lower so the lower cavity need to be sanded down. The rear take down pin hole alignment was off as well, so I had to file down the mating surface of the lower so the upper and lower could align for the take down pin. Luckily the pivot pin holes lined up just fine. Only other issues I had was the safety selector detent hole was a tad out of alignment (I'm being a bit over critical here). It's either JMT's spec or my jig's alignment or a combination of both that caused this. So when you look at the safety it looks a little crooked, and there was a over molded area on the rear of the receiver under the buffer tube I had to take down. I didn't want the back plate to look crooked. One other minor thing I discovered was a few small voids in the receiver itself I unveiled as I was milling out the cavity. Probably from the molding process, but it was all very minor which is a good thing in my opinion. My next post will be the finished product


-
First 308 AR build and questions about Juggernaut's Rail
haewired replied to haewired's topic in Building a .308AR
So I'll be the guinea pig here as I haven't seen any range reviews of any 308 polymer lowers here unless I missed them. Well, we are about sharing experiences! On that note, there are a lot of products and manufactures out there, and it seems like many of the parts I'm using hasn't been reviewed before. Should I submit a review for any parts not reviewed in the past after my build report? Or would it be too much? -
First 308 AR build and questions about Juggernaut's Rail
haewired replied to haewired's topic in Building a .308AR
Where and/or how did they fail? I would think the weak spot would be around the Buffer tube ring, the bolt catch area and maybe the trigger pin holes. -
First 308 AR build and questions about Juggernaut's Rail
haewired replied to haewired's topic in Building a .308AR
-
First 308 AR build and questions about Juggernaut's Rail
haewired replied to haewired's topic in Building a .308AR
Thanks everyone! The most painful part of any exotic build is the wait time for unique parts and coatings. It's all slowly coming back together though, and hopefully it'll be done by Next week along with a brief range report. Like you this is my first 308 build. I'm interested in the hybrid lowers from Tennessee Arms, I'll have to check them out. I'm interested in the Juggernaut Aluminum lower as well. What's "The Rule"? I looked under forum rules but I didn't see anything specific? -
First 308 AR build and questions about Juggernaut's Rail
haewired replied to haewired's topic in Building a .308AR
Thanks Simon, I don't know how well polymer will hold up to the punishment from the 308 with it's "Extremely durable fiber polymer materials ". To be honest I was really interested in trying out a 80% build and I thought the JMT looked pretty cool and would be a good "beginner" 80% lower. Little did I know that it needed filing and sanding to get everything to fit. Juggernaut tactical replied to my inquiry about installing their rail. It sounds like the barrel nut has flats and can be torqued down with a open ended wrench or crows foot. They may be slow with filling orders (it seems to me) but at least they're good about answering emails. So far it looks like I'll be the first one on the forum to experience installing the Juggernaut Tactical Rail. I also can't find any information concerning the JP Rifles side charging upper PSC-19. When I'm done with this project, I'll write up my reviews for these items in case anyone's interested in the future. Times like this it would be really nice to find some kind of information about thinks like this, but there's also a first for everything. It seems that the AR 308 world is very small especially custom builds. So far my build is coming along. Now I have to take them apart to Cerakote them to FDE.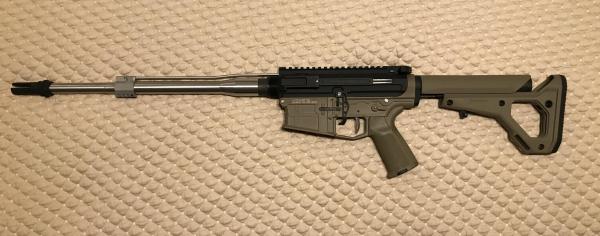
-
First 308 AR build and questions about Juggernaut's Rail
haewired replied to haewired's topic in Building a .308AR
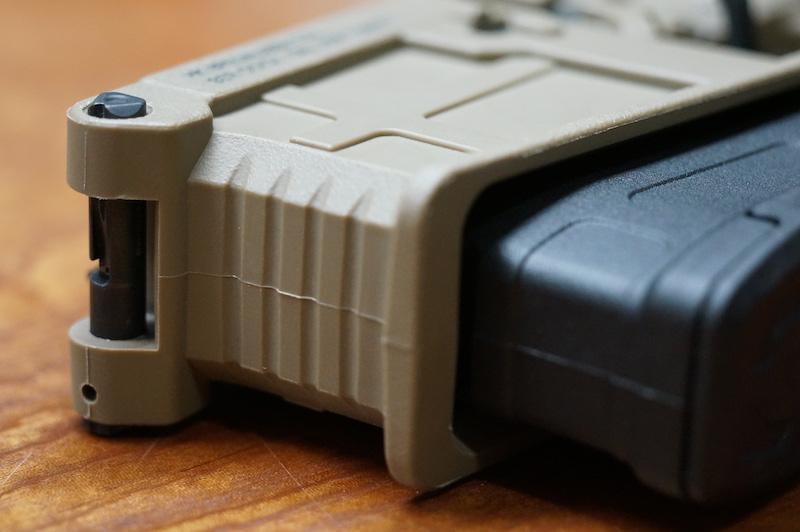
After some more observations, the Hex Magazine and the JP Side Charging upper PSC-19 had some tolerance issues. The upper part of the magazine would bind itself into the upper receiver causing it to stick. With the bolt catch holding the bolt back it cant assist with the magazine to fall out. So I took some sandpaper again and shaved down the areas in the magazine making contact till it falls on it's own when the bolt is locked back and the catch fully engaged. I don't know if the JP upper's dimensions will affect all magazines. It's something I'll have to find out as time goes on when I collect more magazines. -
Thanks! I've already started another thread under "building a 308 AR" Here's my Bill of Materials: JMT Tactical Polymer lower / Larue Tactical Straight Bow MBT trigger / Phase 5 Tactical Extended Bolt release / Radian 45* Safety selector / Magpul MIAD grip / Extended Mag Release JP Rifles PSC-19 Side Charging upper / Radian Raptor LT Charging handle Full Mass Bolt Carrier Group / JP Enhanced Bolt Magpul Gen2 UBR stock / Heavy Buffers XH buffer / JP Polished Rifle length Spring (The spacer has been removed from the UBR Stock for the A5 length) Criterion Hybrid Contour 18" 1/10 Barrel, Nitride finish, Mid length gas length / JP Adjustable Gas black / AAC Blackout Muzzle Break 51 Tooth Juggernaut tactical 15" Free Float Barrel I have a 16" Bear Creek Arms Barrel, yes I do but how can I say no to a $50 on sale stainless steel barrel with a guaranteed MOA accuracy? It does need to be crowned though.