Cliff R
-
Posts
619 -
Joined
-
Last visited
Content Type
Profiles
Forums
Downloads
Gallery
Store
Everything posted by Cliff R
-
Thanks. Deb's been around forty something years now. Couple of years ago she was having one of those "wine tasting" parties with a group of her friends. I came in for a minute and had to walk thru the living room to get to my "man cave". One of her friends (about 10 wines into the tasting) spouted out something about us being married for 40 years, and asked how do you do stay married that long, blah, blah, blah. I quickly looked at Deb and said: "you quit getting naked and see how long we stay married".......Her friends were literally rolling on the floor laughing!......LOL Anyhow, back to work, I put the 450 in the sun to "cook" the paint on all morning.........
-
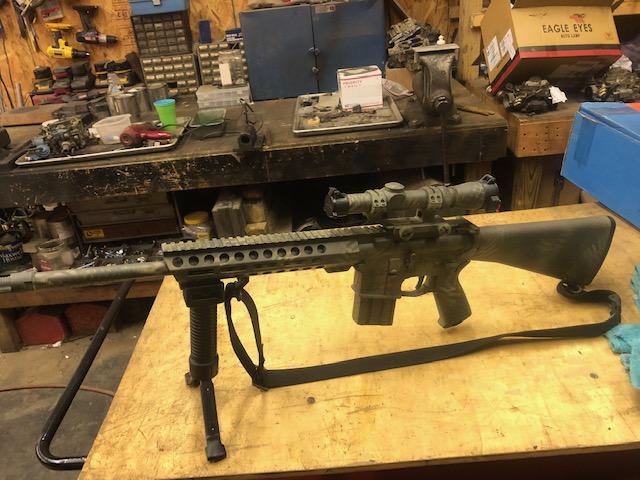
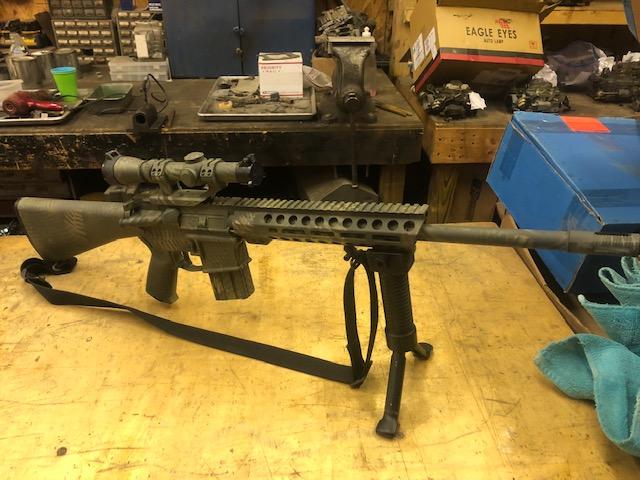
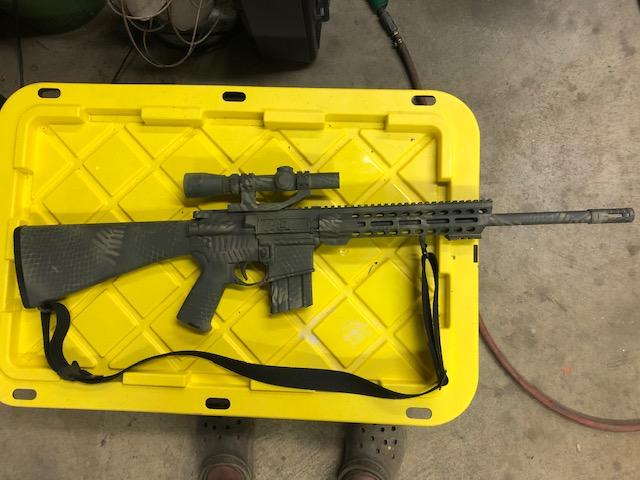
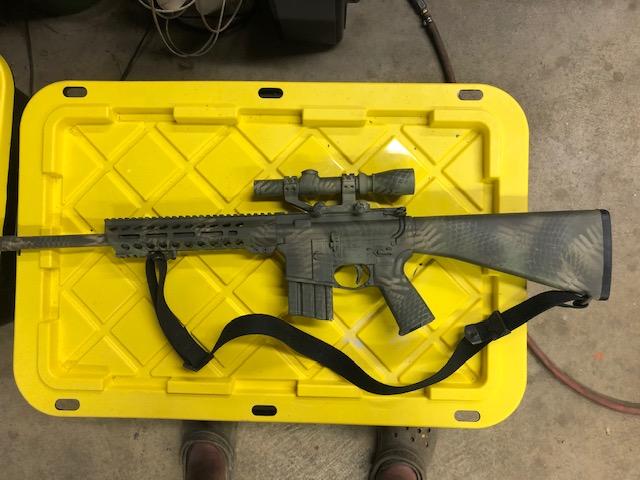
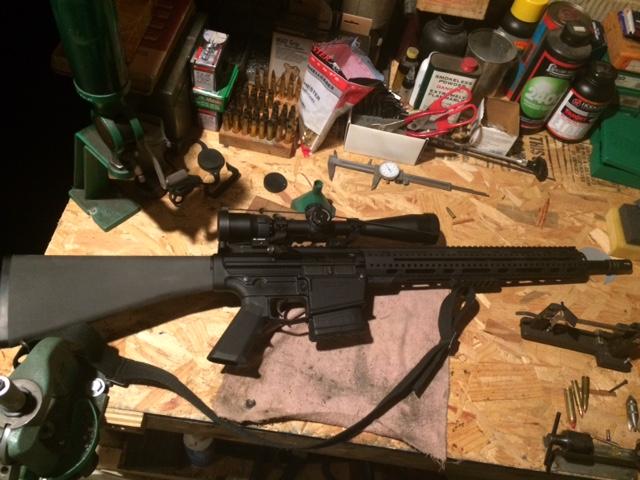
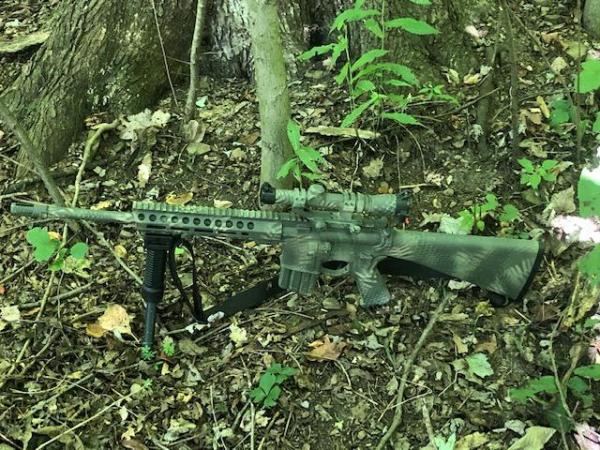
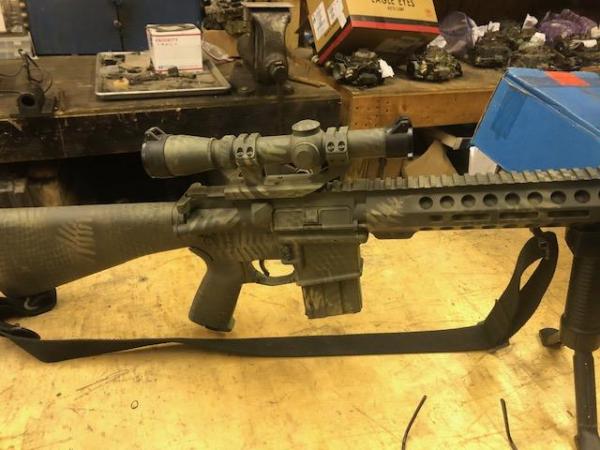
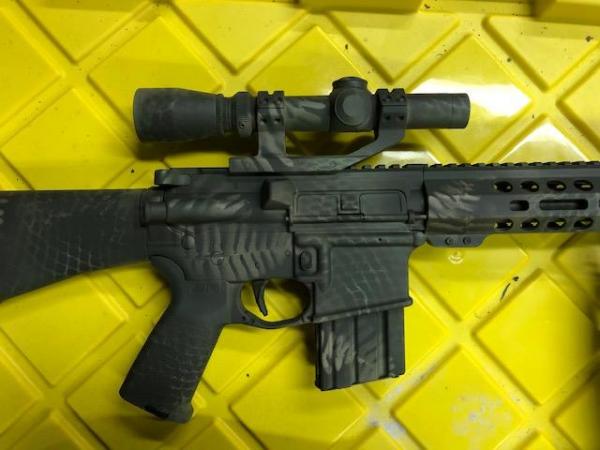
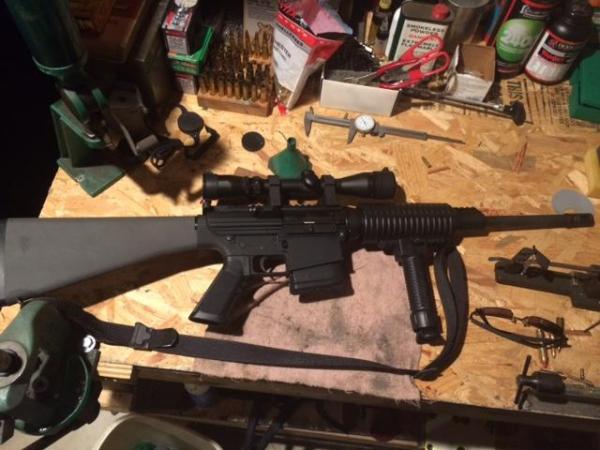
Rustoleum, Khaki, Army green (light), Deep Forest green (dark). I have black and a dark brown but didn't use them on this one. Final product:


-
It's actually the first AR that I've camo-painted. I've done some equipment before, deer stands, climbers, my home made climbing sticks, etc, but never any weapons. Relatively easy, the prep takes 3 times as long as the painting. total time for the entire project about 2 hours. I taped off the trigger, scope and butt plate. It was pretty cool in the shop yesterday so also pre-heated with one of Deb's discarded hair driers I use for a heat gun. I also warmed the paint between coatings to help it dry faster and not run. Most of the final detailed work was done with an old 30 round mag clamped in the shop vise to hold the weapon while I stretched the fruit bag over some areas and "dusted" them for a snake-skin appearance. I walked out back of the shop and obtain a fern for the foliage part of the break-up patterns. I quickly found that keeping things tight and light spraying staying back about 10" or so produces the most pronounced patterns. After all the break-up was finished I used the dark green to blend into and "soften" lighter areas. A little goes a long ways there for sure. This project was a warm-up for my 308-AR, it's next on the list........ If anyone is interested in the method that I used it's really simple. 1. Completely degrease with brake-clean, dry with compressed air. 2. Tape off or remove parts you don't want painted. I like some "transition" and didn't want my flip-up scope plastic scope caps painted so removed them. 3. After prep give it a very light base coat with Khaki, sand or tan would be equally as good. 4. Come back and apply a nice even coat with Khaki until you get full coverage. Make sure to MOVE the safety/selector or you'll have a dark patch under it after all the work is done. 5. Next diagonal stripes with light Army green connecting them top and bottom. 6. Dark green is next thru the fruit bag right over the light green diagonal stripes holding the bag tight and connecting the pattern top and bottom. It's OK to drift over into the Khaki but pretty much follow the light green diagonal stripes, it's really not fussy. 7. More dark green on the exposed Khaki using the fern. This is the tricky part and you need to hold it close and very light pattern without much movement with the can or it doesn't pattern well. Also watch for build-up of wet paint on the fern so you don't get some drops onto the rifle. Best to obtain a new piece instead of risking dropping wet paint onto your work. After all that is good and dry (I was cutting grass between coats so minimum 30 minutes each) I came back and "dusted" any light areas and also did some "blending" from the lighter areas to the darker ones. Staying back and very light bursts work best here. I got two close a couple of times out on the barrel but you can't see that in the pics but it pretty much wiped out the snake-skin and fern patterns in a couple of spots. The best part of the whole deal is that there are no rules, and the only person you have to please is yourself. Even better you can "touch-up" any mistakes after it's dries for a while. For the most part I'm pretty detail oriented and like my stuff to not only work well it needs to look good too. That especially goes for the woman in my life!....LOL......Cliff

-
Thanks. It's probably better suited for jungle warfare than hunting in these parts in the Winter months but I liked it so much when I finished up the dark green I didn't add any brown. Instead I went back and blended more green to break up the transitions and shade some of the lighter areas. I'll put the scope covers and bipod back on it tomorrow, didn't paint those, the butt-plate or the storage cover for the grip.......
-
Well, finally found some time after a long work day to spend a few minutes on the new camo paint job. Here ya go:


-
Cool, tks for the pics. Trying to find some spare time right now to get started on mine. Just wasn't sure if I wanted to start light and go dark, or dark then go lighter. Seems to several different opinions or methods used on that deal, and some use stencils where others use local foliage, then others are using laundry bags, netting, burlap etc to help break up the patterns a bit......and also the sponge dapping as seen above......looks great to me!......
-
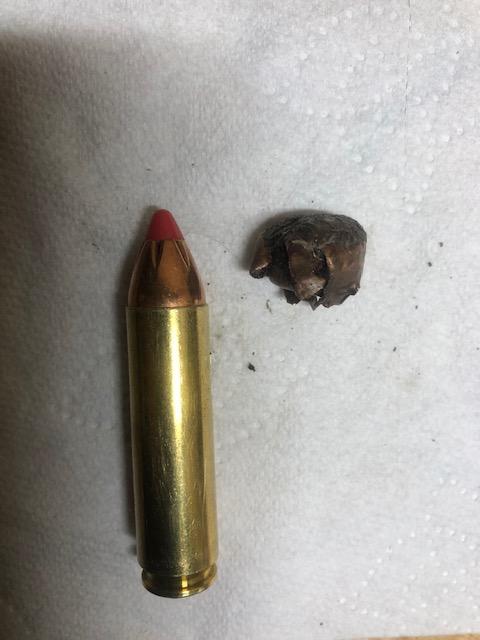
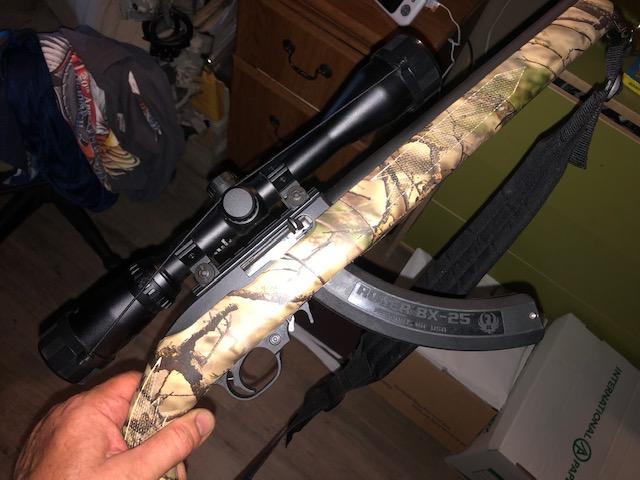
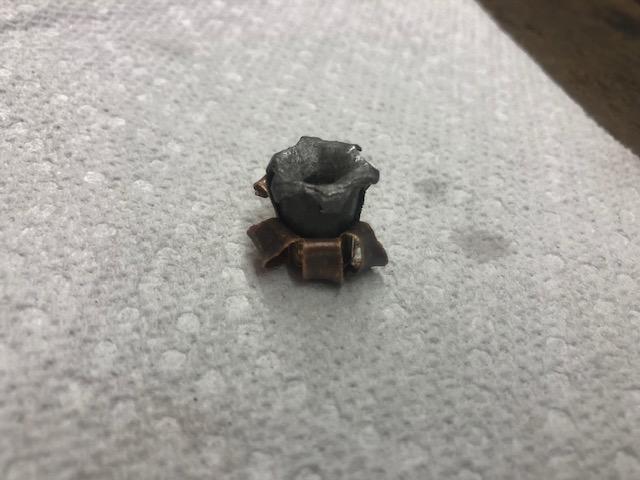
I've decided to camo my 450 Bushmaster. It will never be sold as I absolutely love everything about it. Out of the box with factory ammo it's one of the most accurate platforms I've ever seen. If all the bullets aren't basically going into the same hole at 100 yards you just didn't do your part. The performance of the cartridge is also amazing. I shot a HUGE buck with it two years ago at 200 yards and planted him right where he was standing. The round went thru both shoulders and was just under the skin on the far side with near perfect expansion even at that distance. Last year I shot a big fat doe with it about half that distance and same result. It's very quickly became my "go-to" rifle for deer hunting here in Ohio. I decided recently to camo paint it and picked up the needed paint and supplies. I alsoI watched a few Youtube videos and dug up a few threads on here. There seems to be several good methods to accomplish a nice professional look. Just looking for some solid advice and a few pics of how they turned out. Some start with a light base coat then go darker, others start dark and go lighter. It also seems pretty common to break up the pattern with burlap, laundry/fruit bags, netting, etc, where others use stencils or local foliage. Just wanted some good solid advice before I take the plunge, thanks in advance........Cliff

-
Update. I took the trigger group back off and low and behold my dumb-ass had the catch spring missing the catch....oops. I opened up the hole a bit, captured the spring on top of the catch and it's flawless!.....Thanks for the tips on upgrading it, pretty sweet deal now when you pull the bolt back when it's locked it actually goes forward!......
-
Ya, I didn't get it "rounded" as I was being a little conservative. It's sticking some so will go back in and open it up some more. As far as the trigger it is excellent and I'm done there. I used a spring kit that was less than $10 and dubbed USA made parts. In conjunction with "working" the hammer and sear a bit it is right where I want it to be for this type of weapon. Very little "creep" and probably around 3 pounds pull or slightly less. It passes the "drop" test so I left enough sear engagement as it's not going to be unsafe or go off unexpectedly. Hopefully I'll find some time later today to get the catch/release working better......stay tuned.......
-
Update. Trigger is done. I ended up buying a spring kit for it, "re-worked" the hammer and see a bit more, perfect. I must not have removed quite enough material from the catch/release. It works about 80 percent of the time but hangs up and requires a little manipulation once in a while. I'll get back on that tomorrow.......
-
Good info, I'm on it...tks.....
-
Cool. All I've done so far was to polish the hammer/sear parts and remove a tiny pit of material to reduce the "creep". I left the springs stock to start with just to see how much improvement there was in just polishing up the parts. It's better but still just a tad too heavy for my liking so I'll go another direction with it. Good to see a lot of support, I'll check out the options and get something better in there...tks....
-
I took the trigger group apart and "worked" it some. Made a World of difference. It was a little intimidating at first, but not too bad once I dove into it. I haven't done any research on them, what is available?.....
-
I've busted close to 50 groundhogs this year with an el-cheapo Tasco 4-12 scope mounted on my Ruger 10-22. I think it was around $60 with rings. It's been beating around on the side-by-side all summer and hasn't budged. I wouldn't be afraid of one as a cheap option for an AR platform. It's amazingly clear on lower powers and not bad at 12 power although you start to see what separates higher quality scopes from the bargain stuff.......Cliff

-
It amazes me to this day how many folks do NOT practice with their hunting rifles from the off-hand position. I'll bet 90 percent just get them dialed in pretty close at 100 yards or so from a pretty solid bench/sand bags, then off on their hunting trip they go. It's pretty rare to encounter big game where you will be able to shoot them from the sitting or prone position with a perfect rest and have time to set-up for the shot. Every single time I've encountered big bulls in Colorado they are moving pretty quickly thru heavy cover and you only have seconds to get on them, determine if they are legal, and put a round or two into the good stuff before they disappear over the horizon never to be seen again. What doesn't help is that every single show I watch on TV shows big bulls standing around without a care in the World while hunters have nearly FOREVER to get set-up on them. I suspect they are on a ranch shooting pet bulls that have been spoon fed by the ranchers hired help since birth. Maybe it's not quite that easy but if you are hunting public land out West fully expect the big bulls to be either hunkered down in chit so thick you can't crawl thru it, or WAY up on a shelf where it would take you all day to try to get up that high to get set up on them. In any case sorry to get a little off-track. It still helps immensely to be using equipment that is dead solid reliable and punching the tightest groups you can muster from it to at least take that deal out of the equation so you know when you missed the only thing you can blame is the jerk behind the trigger!.........Cliff
-
There will always be some human error when bench resting a weapon no matter how you are set-up to keep things from moving. Experienced shooters know how to minimize the problems associated with breathing, sight alignment, grip on the weapon, trigger control, etc. What we try to do as dedicated enthusiasts is to minimize the variables that we have the most control over, the quality of the weapon and it's parts, barrel, trigger pull/smooth/crisp, scope mounts, high quality optics, and ammunition. It goes without saying that tighter groups at shorter distances play a big role when you really start stretching things out some. It's still not a perfect science and reminds me when I used to shoot on the rifle team back in my military days. For the most part most folks did quite well in the prone position "locked-in" and slow fire. Some typically did better their as they had their sight dope down pat and better at judging the wind, etc, but for the most part you see higher scores on that part of the course. It's when you go to the standing position where you really start seeing some HUGE deviations in the scores, and I suppose it's still like that in 2020........Cliff
-
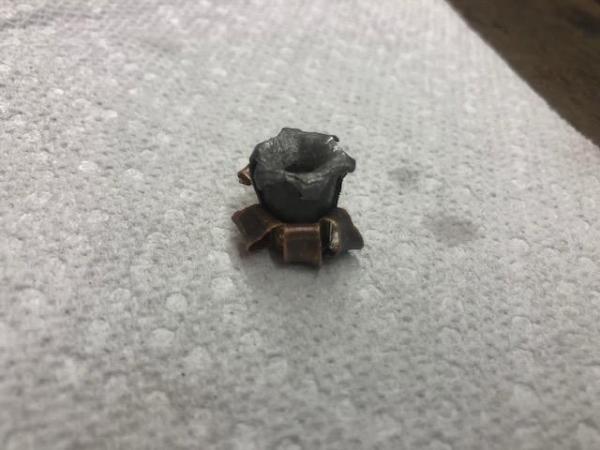
".308 Win is WAY TOO MUCH for clearing a house. Rule that out, if that's really an intended goal - it'll go through the first room, second room, third room, exit the house - and might stop in your neighbor's house. If you're lucky. There's a lawyer attached to every round you fire. .308 Win is not a Home Defense caliber." Truth right there for sure. A better choice in a long gun for "home defense" is going to be a 12 gauge shotgun loaded with #6 low brass. Any encounters in your home with intruders are likely to be close range, low light or dark, moving targets and you will only have seconds to make decisions to use deadly force. For sure you will NOT be thinking about over-penetration, shooting thru a wall or walls and hitting family members, etc. At close range there are very few weapons that can delivery a full ounce of lead on target and be as devastating to the recipient as the 12 gauge shotgun. Build you rifle for hunting, target shooting, plinking or whatever but keep something else close to the bed at night for defending the home and family....IMHO. Even much lower powered handguns have the potential for shooting thru a wall or walls and endangering others in your home. Recently I did some testing with some 185 grain Hornady bullets in .45 caliber to test expansion. I had them loaded pretty "hefty", over 1100fps. In my 45XDS those rounds penetrated 3 one gallon jugs of water and passed right thru a 2"x 8". It took 4 gallon jugs to slow them down enough to stop them for inspection, and they still put a pretty healthy dent in the board before falling to the ground. Sorry to get off-track a bit, hope the build goes well and meets all of your expectations......
-
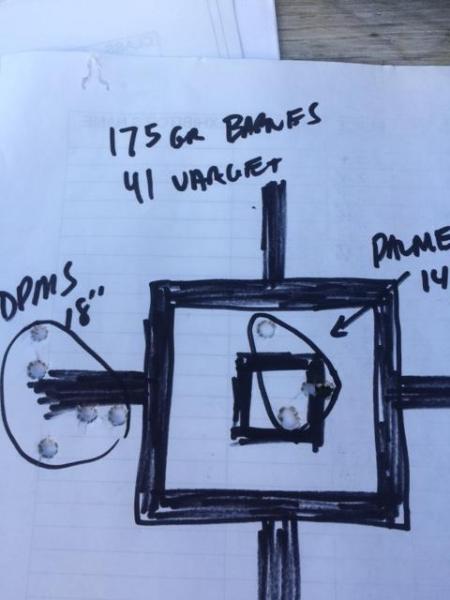
Here might be an example of what you are describing. The center group in the pic below if from my 308-AR. It has a light profile 14.7" barrel. The first two rounds are nearly in the same hole and down at the 6 o'clock position. The next two round nearly in the same hole at 3 o'clock. The last round or "flier" is outside the "box" at 12 o'clock. Compare that group to the same loads fired thru my DPMS to the left where it just shoots a "group". I didn't take any other pics but the 14.7" rifle does this with enough consistency that it is not coincidence. Most likely just the "nature of the beast" and comes from heating up. It's topped with a Leupold scope in a "rock" solid mount. Matters not in the big scheme of things. At the end of the session I backed up to 300 yards, leaned over a big round hay bale up near the barn and fired 5 rounds thru it as fast as I could get back on target. The resulting "group" fell just inside of 6", well on a Mule Deer or Elk, which is what the rifle was built and is used for........Cliff

-
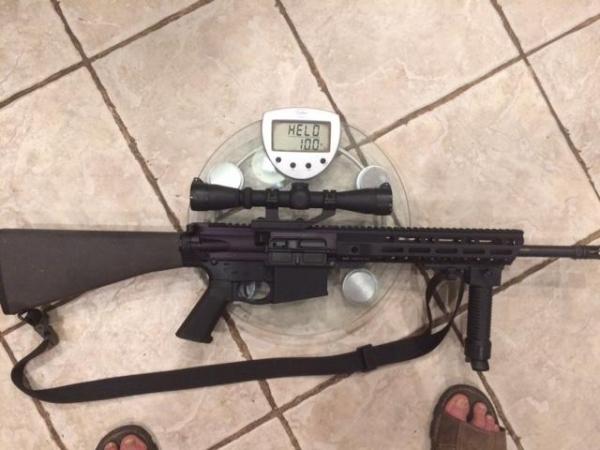
+2, ten pounds is LIGHT for one of these weapons........14.7" in the pic below with a light profile barrel.....
-
The round bales are up so I can set up in the middle of the field on some high ground and shoot in all directions. Time to get out my AR-15 Varmint rifle. Was up there last night and many shots were just WAY too far for the 10-22. I nailed one at 160 yards when I first got up there but didn't hit him well. He spun around, kicked up some dirt and darted into his hole. I had several other shots available out near 300 yards that I didn't attempt so going back today with the AR. I may even take the 308-AR up there just to get some early practice before heading out to Colorado in October. Those big hay bales make a nice rest and the 308 is accurate enough to take groundhogs out to at least 300 yards or so........
-
Cool. I set up on a fresh cut hayfield across the road yesterday. Hadn't been there 5 minutes when one came out about 125 yards above me. Nailed him good but he managed to barely make it back to his hole before Sadie could cover the distance to finish him off. They should be round bailing that field later today so we'll have some good hog hunting until it grows up enough so they can move around undetected........
-
Probably my last update. The beans are now high enough that the ground hogs can manipulate thru the rows undetected. The window of opportunity is short with soybeans, you literally only have about a week of good hog hunting until the beans are tall and thick enough to cover their movements. It was fun while it lasted. I didn't keep accurate numbers but I gave at least a dozen of them a good bellyache and planted 4 right where they stood, the furthest shot just under 200 yards and the closest about 60 yards. The hit ratio started out very poor out past 100 yards (I was 100 percent to that distance) until I figured out the hold-over at longer ranges. The little 22 has the trajectory of a rainbow past 100 yards. I didn't even bother looking at any ballistic tables on it, just kept holding over until I was lobbing them on target with good success, and keeping good mental notes the entire time Just wanted to post some info about how successful one can be with this sort of thing and not tie up a bunch of money in anything fancy or expensive. The rifle was an off the shelf 10-22 tactical, camo stock with no barrel band. The only modification done was to remove the trigger group and polish the sear, hammer and remove a little material to get rid of the noticeable "creep". That deal isn't for the faint of heart as the trigger group is a little complicated and the first time I took it apart it took half hour or so to figure out how to get it all back together. The scope was Tasco's bottom of the barrel 4-12 rifle scope, not a 22 dedicated version. It came with rings and the 10-22 has a rail already installed for them. Going to get the AR-15 out for the rest of the season, and my good hearing protection!........

-
Sounds a LOT better than some slow braised groundhog to me! My son brought home about 35 pounds of Walleye back on the weekend of the 4th. I don't think it gets much better than that for fresh water fish. I've fried it, grilled, blackened and even laid fillets on foil in the air frying and it's fantastic every single time.........
-
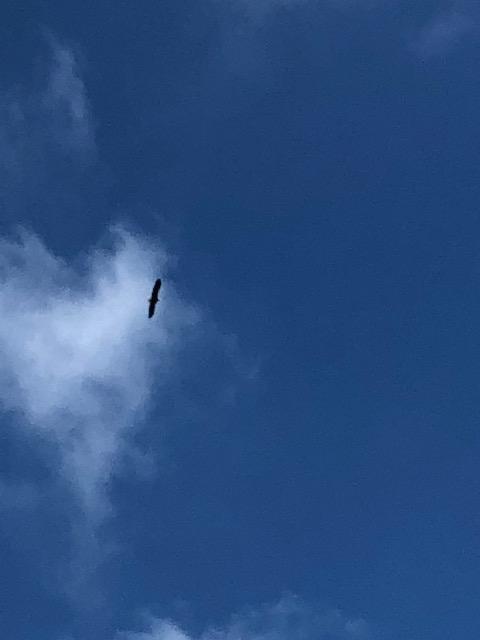
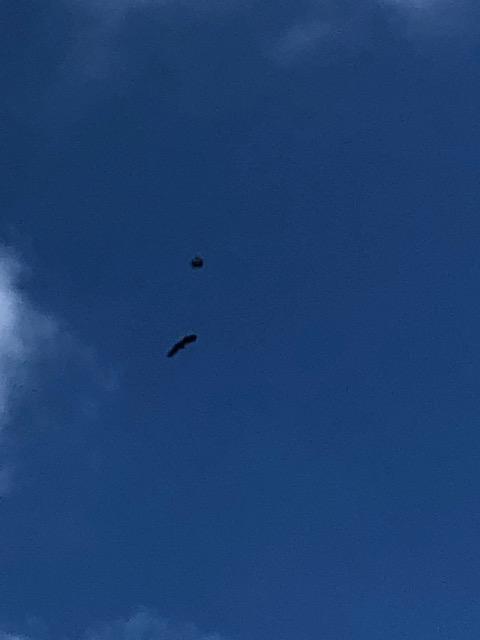
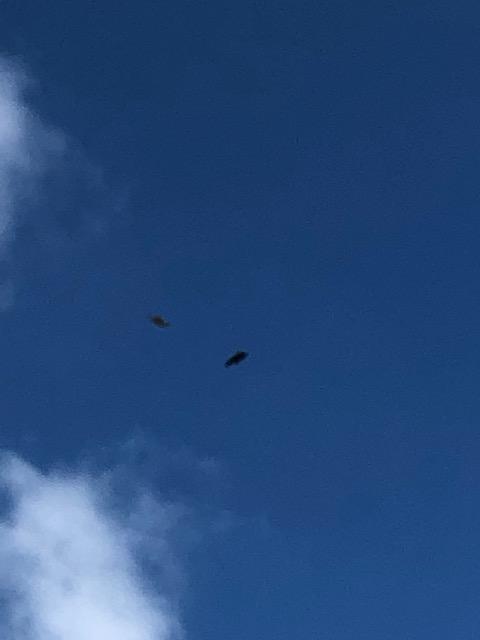
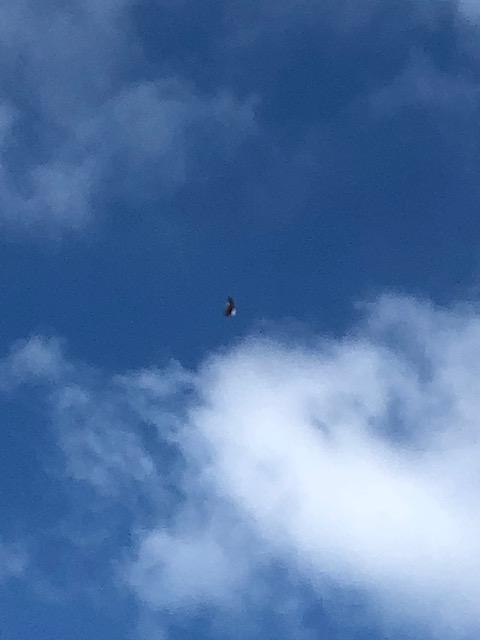
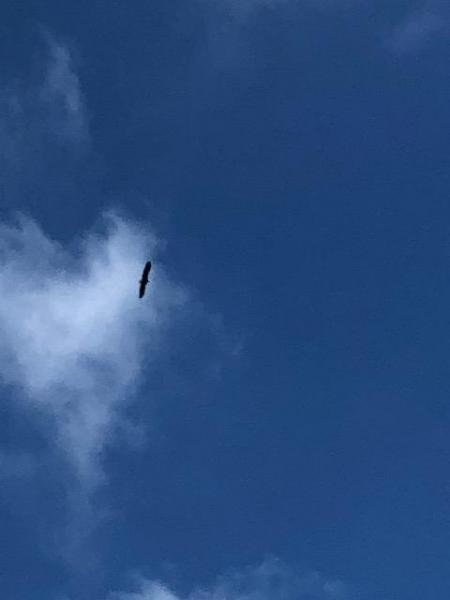
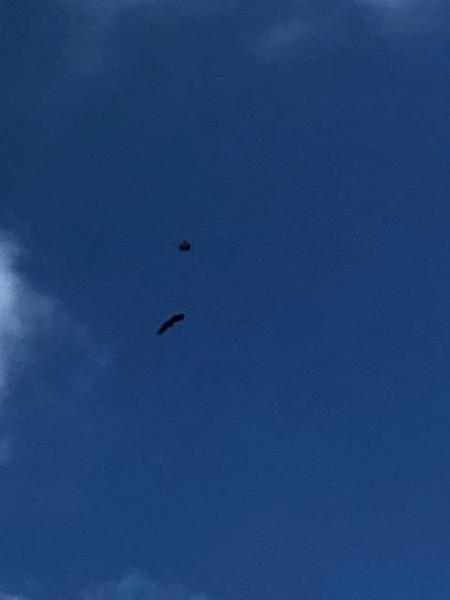
Can't get decent pics of the Eagles at 200 yards in a bean field, they just look like tiny black spots......


-
Nah, not eating any of them but may put them on the menu if we do another round of this doomsday prepping staying at home chit. My local Eagles are sure liking them though. It's cool to watch a big crowd of buzzards sit back and wait their turn while the Eagles eat first......it's call RESPECT!......