Madhouse
-
Posts
1,767 -
Joined
-
Last visited
Content Type
Profiles
Forums
Downloads
Gallery
Store
Everything posted by Madhouse
-
Again, thanks very much for all of the input guys. This is indeed more trying than building an AR, but I expected it to be and wanted the challenge. Ok, so I've manipulated the right tang on the sear spring and it holds the grip safety out nicely now. I'm actually able to cock the hammer (it does indeed stop at the first notch), and will lock back in full cocked position. A pull of the trigger fires the pistol as it should. But there are still a couple of things that need tweaking. I had the pistol fully assembled, and racking the slide back cocks the pistol, but the slide only goes back barely enough to cock the hammer and does not go its full travel. Obviously this is an issue, it seems to have a hard stop, at first I thought it was catching on the ejector, but it isn't. I can't quite determine what is stopping the slide from travelling. The other issue is, when I cock the pistol, the hammer comes back so far that it pushes down on the grip safety and depresses it. The good news is, the pistol cocks fully, the trigger fires the pistol, and the thumb safety stops the pistol from firing. I've just got to get the action working correctly, and get the hammer to not push the grip safety down. I'm not getting frustrated, and I'm certainly not going to rush anything, I want this thing functioning completely safely before I test it with snap caps. Then I might mail it off to Tom so his crazy ass can do the first live fire! >:D
-
Love my XD's too! Had one in .40, sold it, bought new in both 9 and 45.
-
Thanks again Terry. So I'm closer than I thought I was to done. I've got it essentially all together, but I'm having trouble with the fire control parts. The hammer doesn't seem to want to stay back (cocked).
-
I really appreciate all of the help so far fellas. I watch countless videos on this as well, and have done almost everything so far based on those, since I came into this with very little 1911 inner-working knowledge. I will try all of the input you've given me. One more topic, if you don't mind - it seems to me that when I slide the mainspring housing in, the sear spring flattens out almost completely, and it doesn't even push the grip safety out. Before the housing goes on, the grip safety has decent resistance, but once it's slid on, the grip safety just flops into it's resting place and is not pushed out. Might I have to manually manipulate the tangs on that sear safety to defeat this?
-
Well, frick. I guess that would be a problem. Thanks hemi!
-
The strut has plenty of room in the slot of the hammer, it is defintely binding on the roll pin. I would have assumed the the hole in the strut was a slightly bigger bore than in the hammer.
-
ss - thanks very much for the tips, I will certainly take the time to polish everything, now that I know One issue I've had, is that when I put the hammer and hammer strut together with the roll pin, the hammer strut is tight as hell - I know it should dangle freely, but I have to manually move it. Any guidance on that? The mainspring was a bear to put in the housing! I had to clamp the housing in my vise and ram the spring in with a screwdriver to get it deep enough to put the retaining pin in.
-
lol
-
Thanks all, it's been fun and frustrating both. Terry, thanks for the tip on the emery cloth. So, I decided to move on from the trigger action, I'll get back to that later. I just need to keep polishing, and that's filler work, so I can do it anytime. I added the ejector, and now the slide has resistance again, so I will have to do some stoning and polishing on that ejector so the slide is smooth again. I heard some good advice, work the part to fit the receiver rather than the other way around - makes sense, I can buy a new ejector if I bone it up. Also I began putting together some of the other components. I put the trigger in place and assembled the magazine release button (3 parts). Man, that thing sucks - you have to put about 10 pounds of pressure on it to depress it, so I'll start cutting winds off the spring until it moves better. I found this was a trick for competition shooters in order to achieve smoother mag swaps. I also started the fire control group parts. I put the extractor, firing pin spring, firing pin and firing pin detent plate in place. When the extractor is not in place, the firing pin parts all slide in well but with the ejector in place the detent plate won't go in, so I think I need to wallow the trough in the extractor where it slides.
-
Damn Drew, that sucks bro.
-
I'm going to assume these sold and lock this thread. PM me if not, and I will re-open it.
-
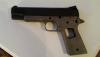
I picked up a stripped Foster Industries frame and a non-descript complete parts kit ($475 total). I'm mostly doing this to gain a better knowledge of the inner-workings of the 1911. The first thing I tackled was fitting the slide to the frame. I put quite a bit of time in filing, stoning, sanding the slide rails on the frame. Once I got the slide on the frame (with some pretty good force) I started lapping it with some Brownells lapping compound. This didn't take too long, really, and I have what I think is a very smooth match, a nice hand-fitted slide. I like the way that came out. The second task was trigger smoothness. Using a Brownells trigger track stone, some sand paper, and much time I was able to get the trigger tracks quite smooth for the trigger bow to glide in. I had to remove some metal from the trigger opening in the frame, mostly on the top side. I also polished the top and bottom of the trigger for a more slick travel. I need to do a bit more here, I'm not yet satisfied with the full travel. The picture is frame and slide only, after being hand-fitted. I'll update as I go along...
-
It's true about brands, it's a Ford / Chevy / Dodge thing. But, if you've landed on getting a Kimber, I recommend the gold match. Mine is old and has an unknowable number of rounds through it, and I still say is the best shooter in my safe. I have 3 other Kimbers, they're all terrific, I carry my Ultra II most of the time.
-
Link still worked for me.
-
Looking forward to seeing this, I still have some stripped pieces that I wouldn't mind coloring up.
-
Moved to Tactics and Training forum. A buddy of mine did a week at Front Site last year, I can't remember what his course was, but it was handguns. He said it was awesome, and highly recommended it.
-
Please do post pics.
-

wtb dpms 308 barrel nut and delta ring / bolt catch
Madhouse replied to timmahhhh's topic in Wanted to Buy
Moved to the proper forum, WTB -
I boycott google on a personal level, but at work it can't be denied. They now are starting to equip their street view camera cars with natural gas sniffers, and they have a fleet of planes to fly their own imagery to keep it more current than bing or navtech. In the GIS world, google is doing cool stuff, so I'm forced to implement some of their tech.
-
LOL!!
-
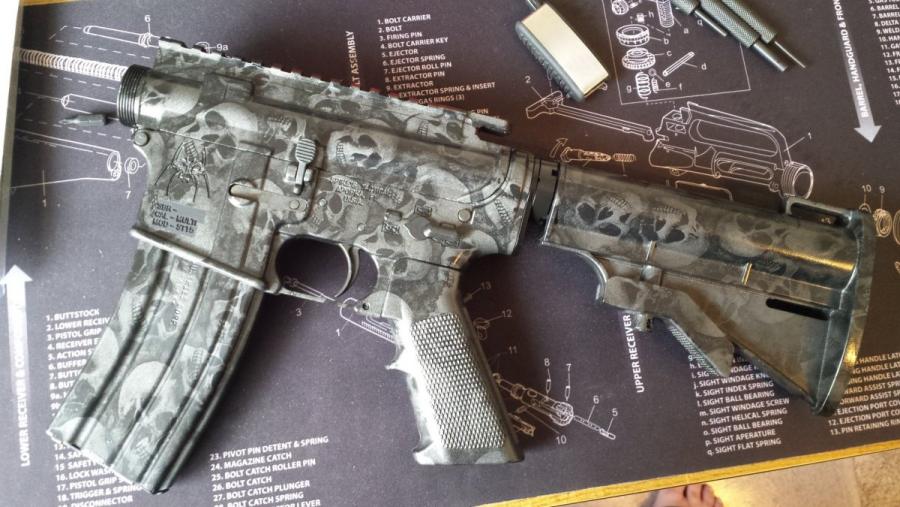
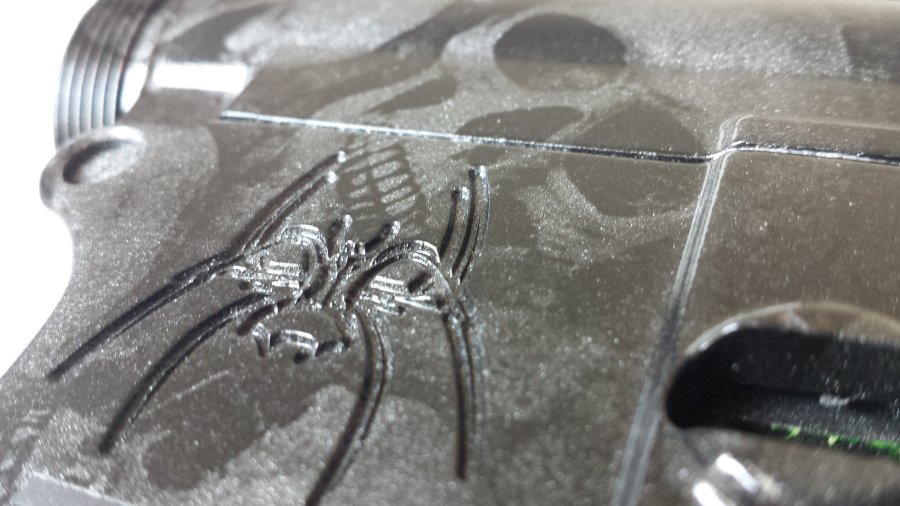
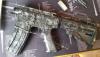
Rob, I'll let everyone know how it wears, but big is right, it's all in the clear coating. He did a nice job on the clear, it seems solid. One thing he told me that I found weird was that I should try not to handle it with bug spray on my hands, I guess that stuff in particular can damage the clear. Blue, I told ya buddy, this build was a spare parts Frankenstein. :)) You pick a template, there are tons of them. I'm pretty sure there are places that will print your design or picture on a film too though. There is a line on the foreend, no biggie though - I'll just put it facing downward, but no detectable seam line anywhere on the receiver parts. I put the upper and lower and grip together before giving it to him to dip, so it all blended. One thing I was impressed with, the pattern even flows in and out of the rails, over the trigger guard, everywhere.
-
Lower parts kit and stock built out now, should have the time this weekend to build out the barrel and gas system. You can see here how I had him mask the serial number.
-
I know it's not for everyone, and to each his own. I may never even shoot this thing, it might just sit in the safe, who knows. I've got very little money in it, $70 lower, $50 upper and a bunch of parts I had lying around.
-
Lol, this is just a collection piece
-
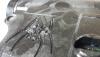
So, my buddy is done dipping my parts. He had some issues with his first tank, so this has taken a while. I gave him $25 for his materials, but he wouldn't take payment. Keep in mind, I'll probably just keep this look for fun, certainly not a home defense carbine. So, here is a teaser pic....